Introduction
If, like me, you enjoy starting your day with a clear overview of what awaits you, this routine can be interesting for you. In this article, we will create step by step, in the iOS Shortcuts app, an automation capable of retrieving the day’s weather, your calendar events, as well as your reminders, and then reading them aloud to you. When you wake up, you will simply need to press a button to get a complete briefing of your day. And if you want to go even further, you can even trigger this reading automatically as soon as you turn off your alarm, for example (see the bonuses below).
Prerequisites
To follow this tutorial, you will need a device running iOS (iPhone, iPad, or Mac) with the Shortcuts app installed. In my case, my devices are running iOS 26.2. Also note that the routine requires an Internet connection, as it relies on a request sent to ChatGPT.
How the routine works
Before moving on to creating the shortcut, let’s take a moment to understand its overall functioning. I have prepared a small diagram that summarizes the most important steps we will set up in this tutorial. It allows you to quickly visualize the entire process, from retrieving the information to having it read aloud by Siri.

We use a note to save the generated briefing and avoid sending a new request to ChatGPT each time the routine runs. This not only saves time but also ensures a consistent result (ChatGPT’s response may vary with each request). It is also more efficient in terms of energy and data, since no additional request is sent to ChatGPT’s servers.
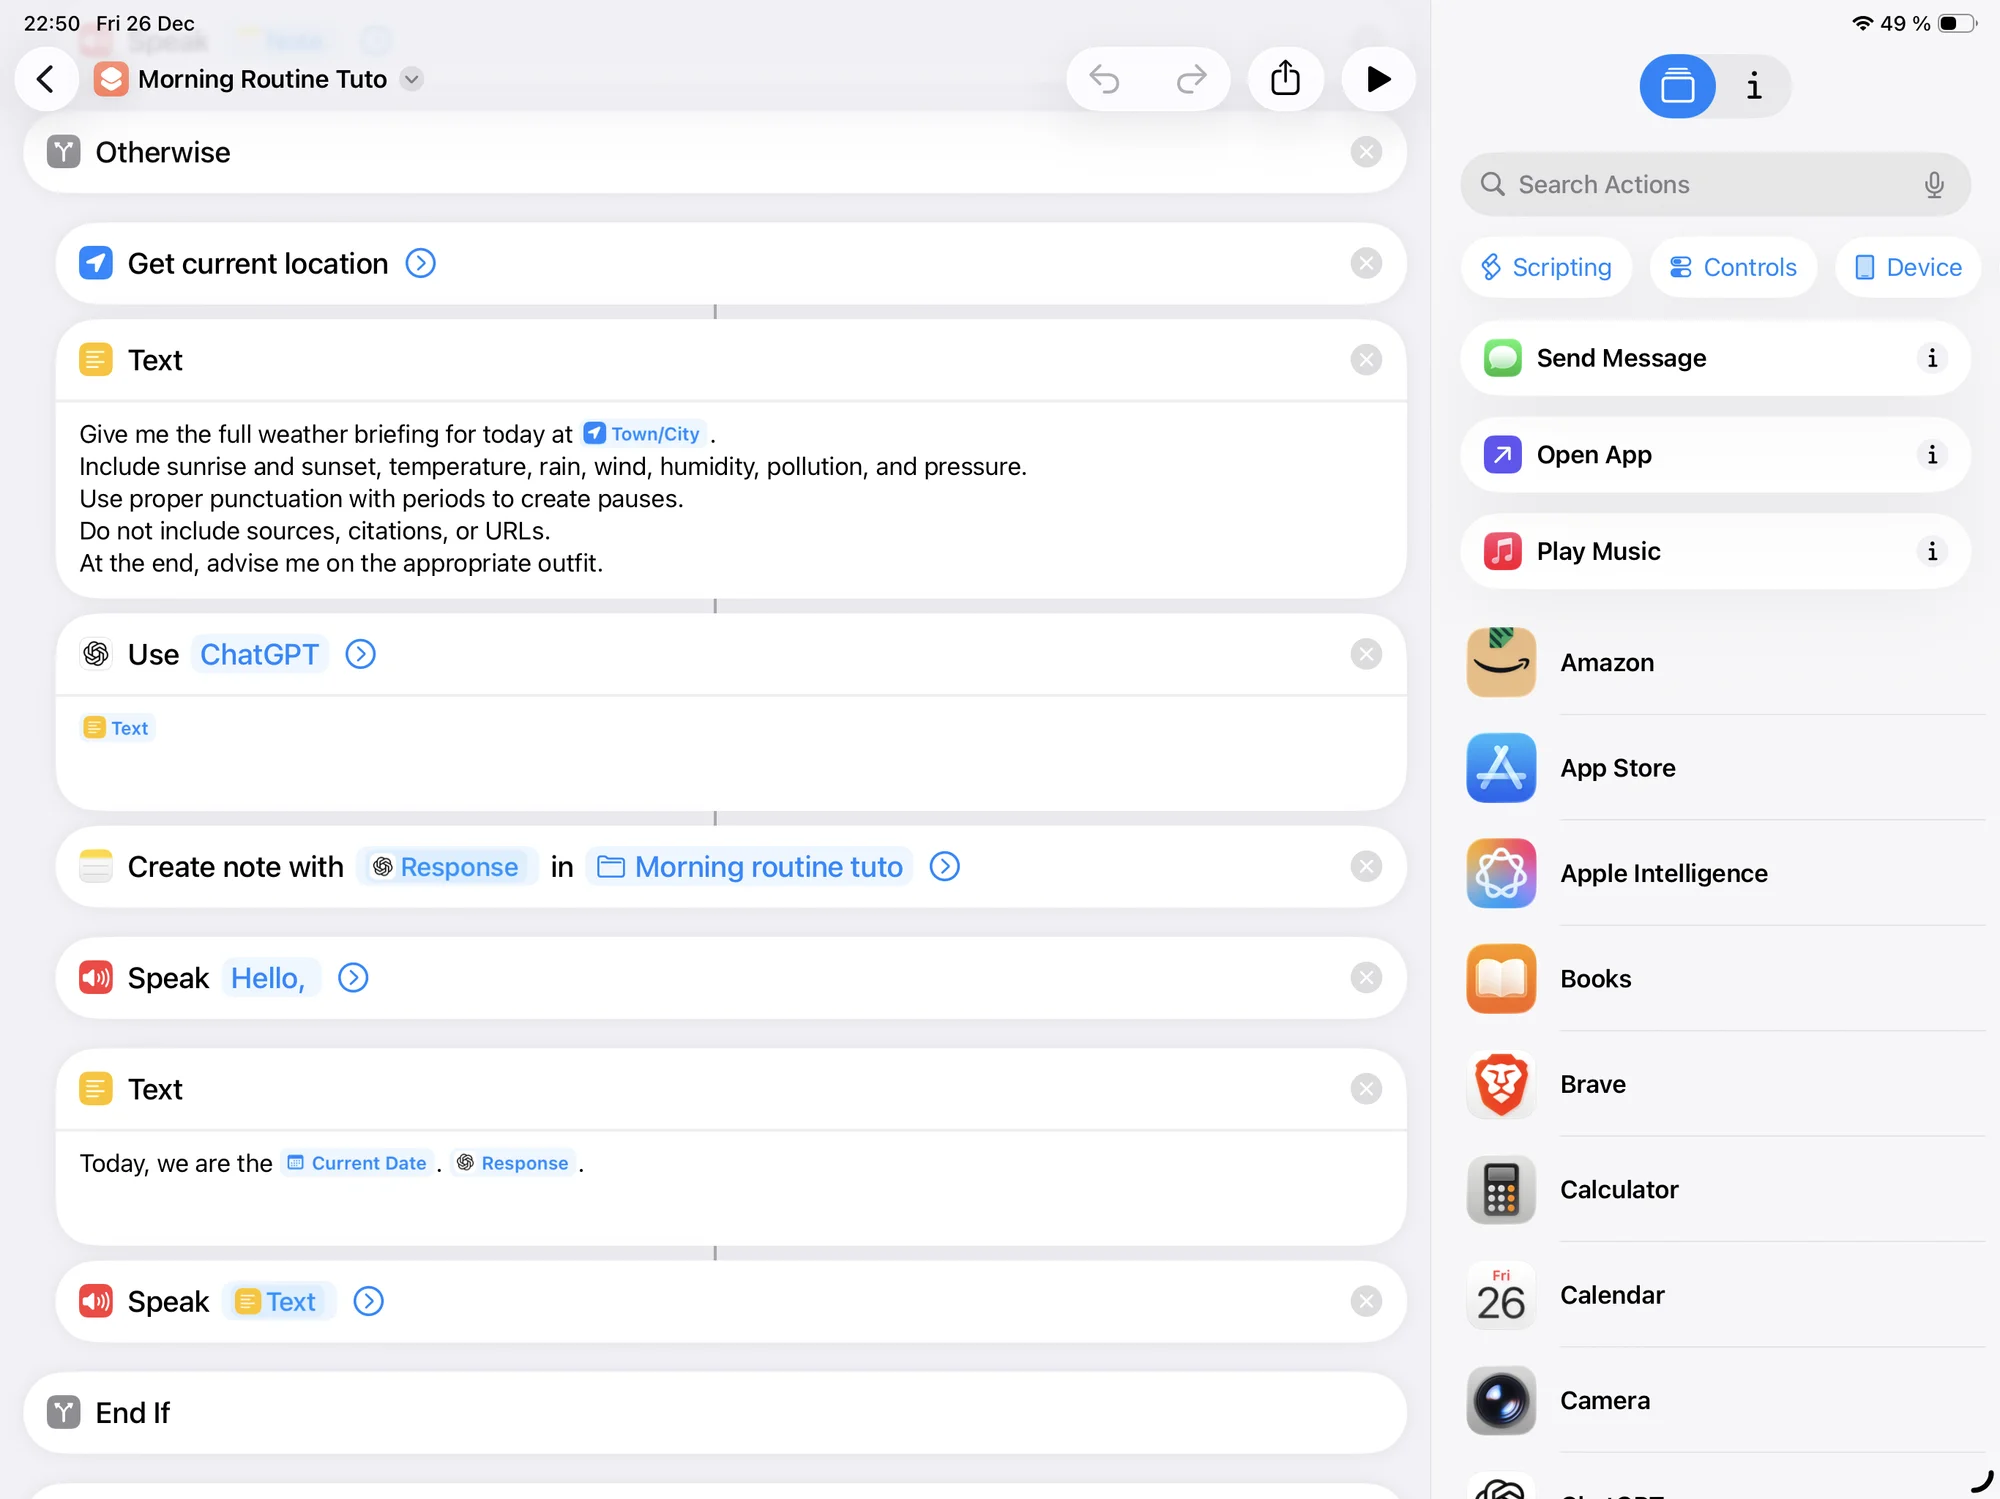
The process is simple: the routine begins by checking whether the note already exists. If it does, the note is directly passed to Siri.
If the note does not yet exist, we will create a new one. To do this, the routine first retrieves our location, then builds the prompt before sending it to ChatGPT. Once the response is received, it is saved in a new note and then read by Siri.
Finally, the routine retrieves the day’s calendar events and reminders and has Siri read them to complete the briefing.
Beginning the creation of the routine
After opening the Shortcuts app and creating a new shortcut, we start by saving the device’s current volume. This step does not appear in the diagram to avoid cluttering it, but it is important: the routine will temporarily adjust the volume so that Siri’s reading is loud enough (in my case, I set it to 50%, but feel free to adjust it as needed).
At the end of the routine’s execution, the initial volume will be automatically restored.
Before modifying the volume, we also add an action to pause any media currently playing. This prevents Siri’s voice from overlapping with music or a podcast, for example (the media pause must be placed before the volume change).
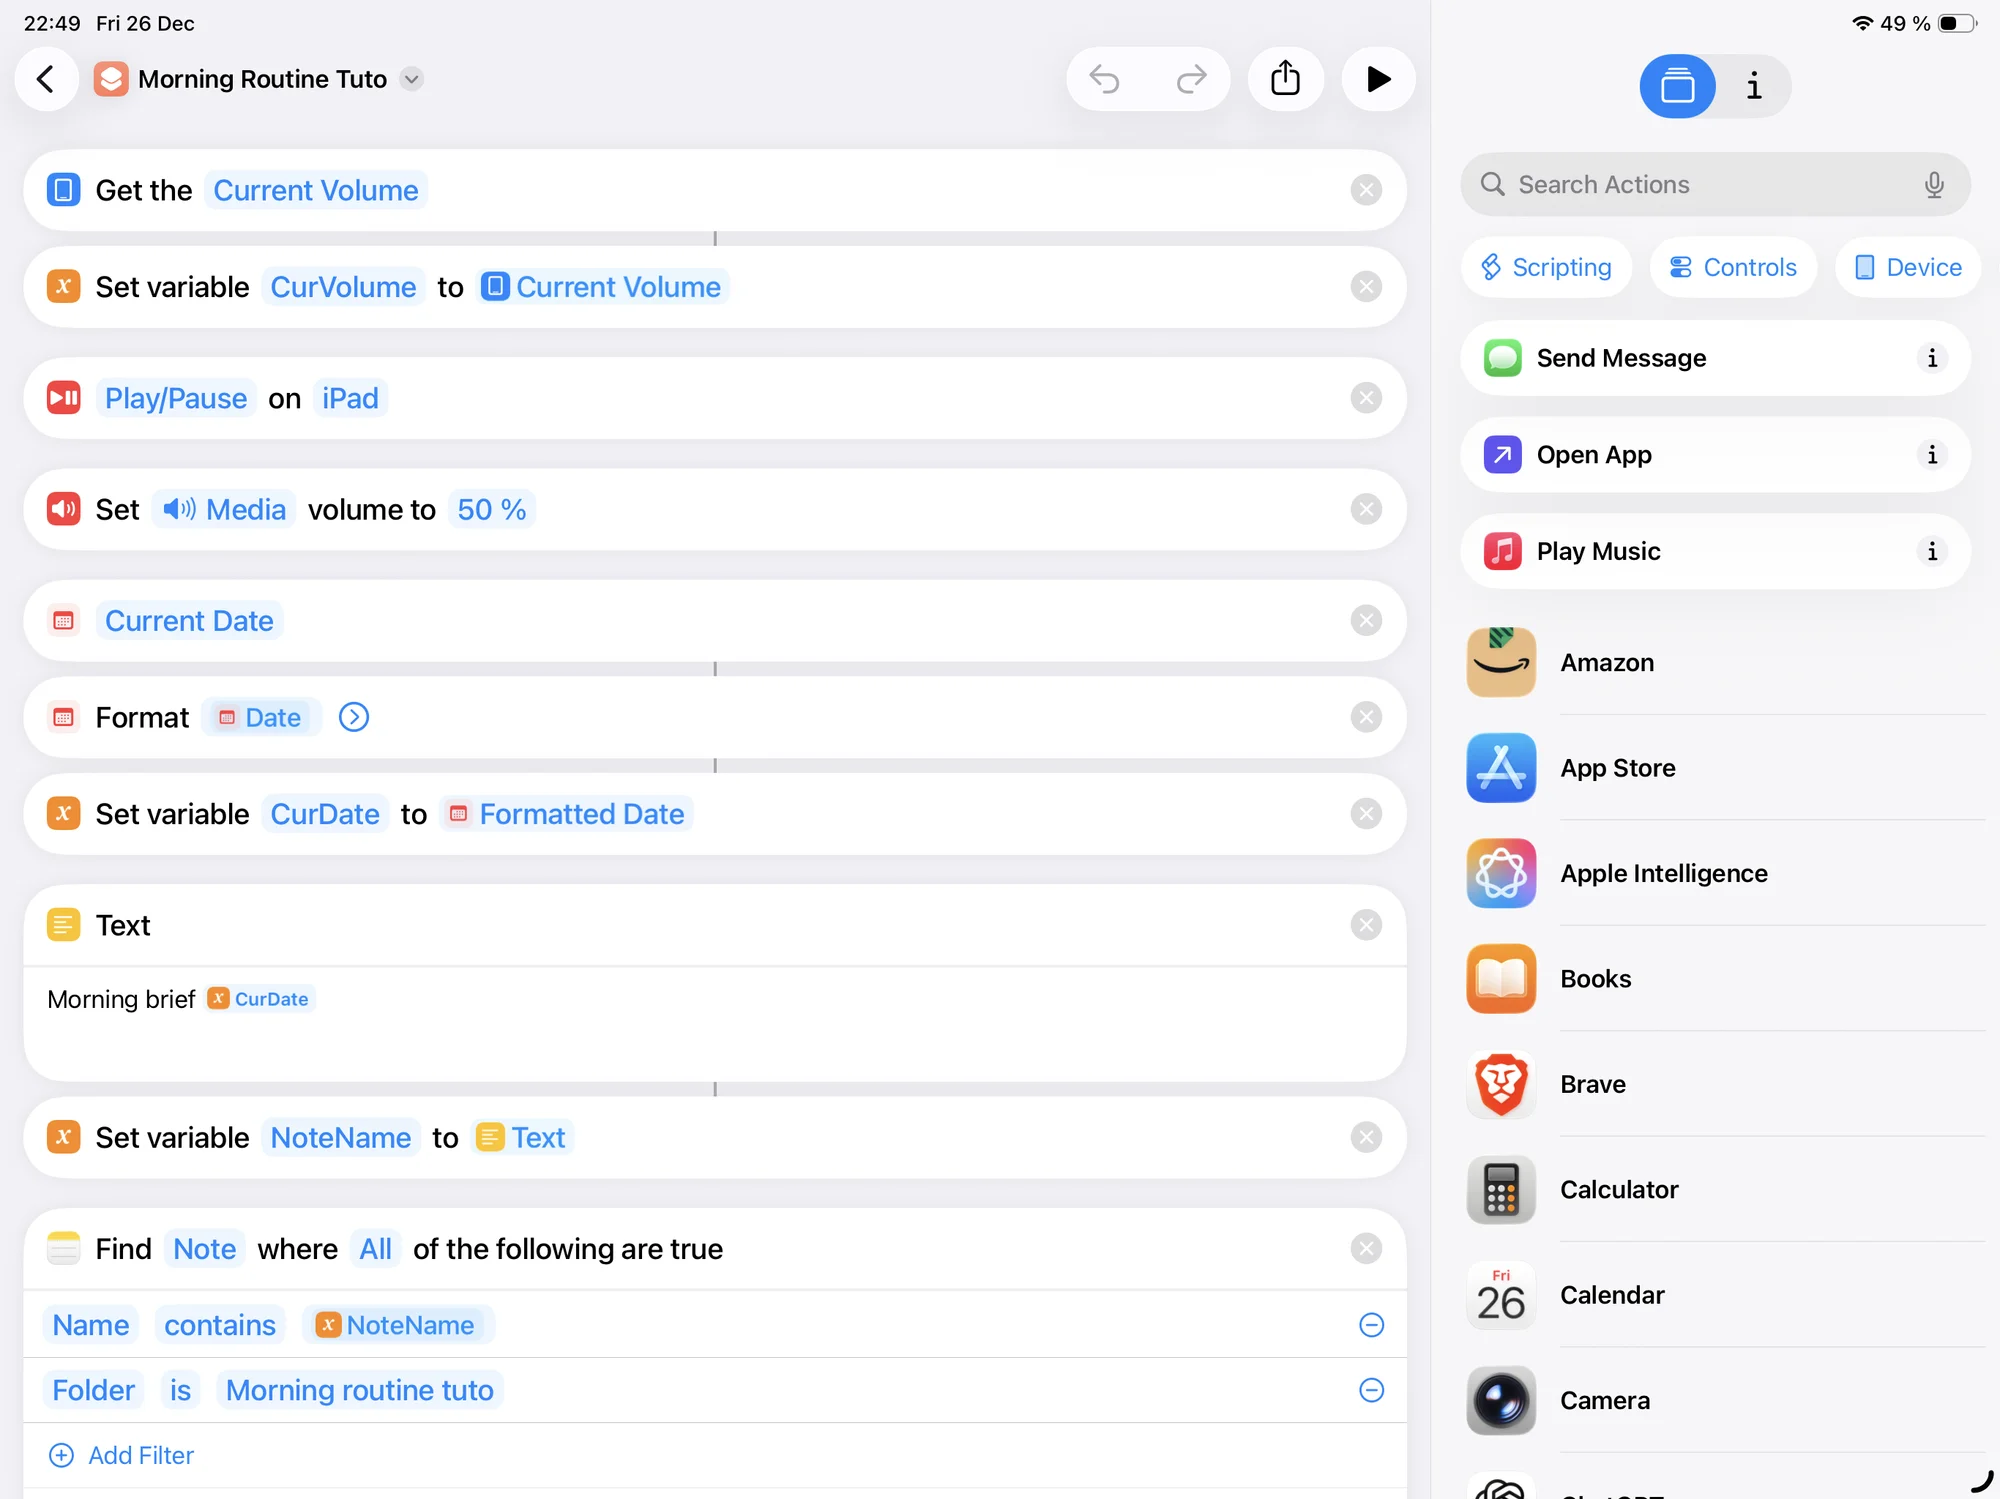
After these steps, we can move on to naming the note we will use later.
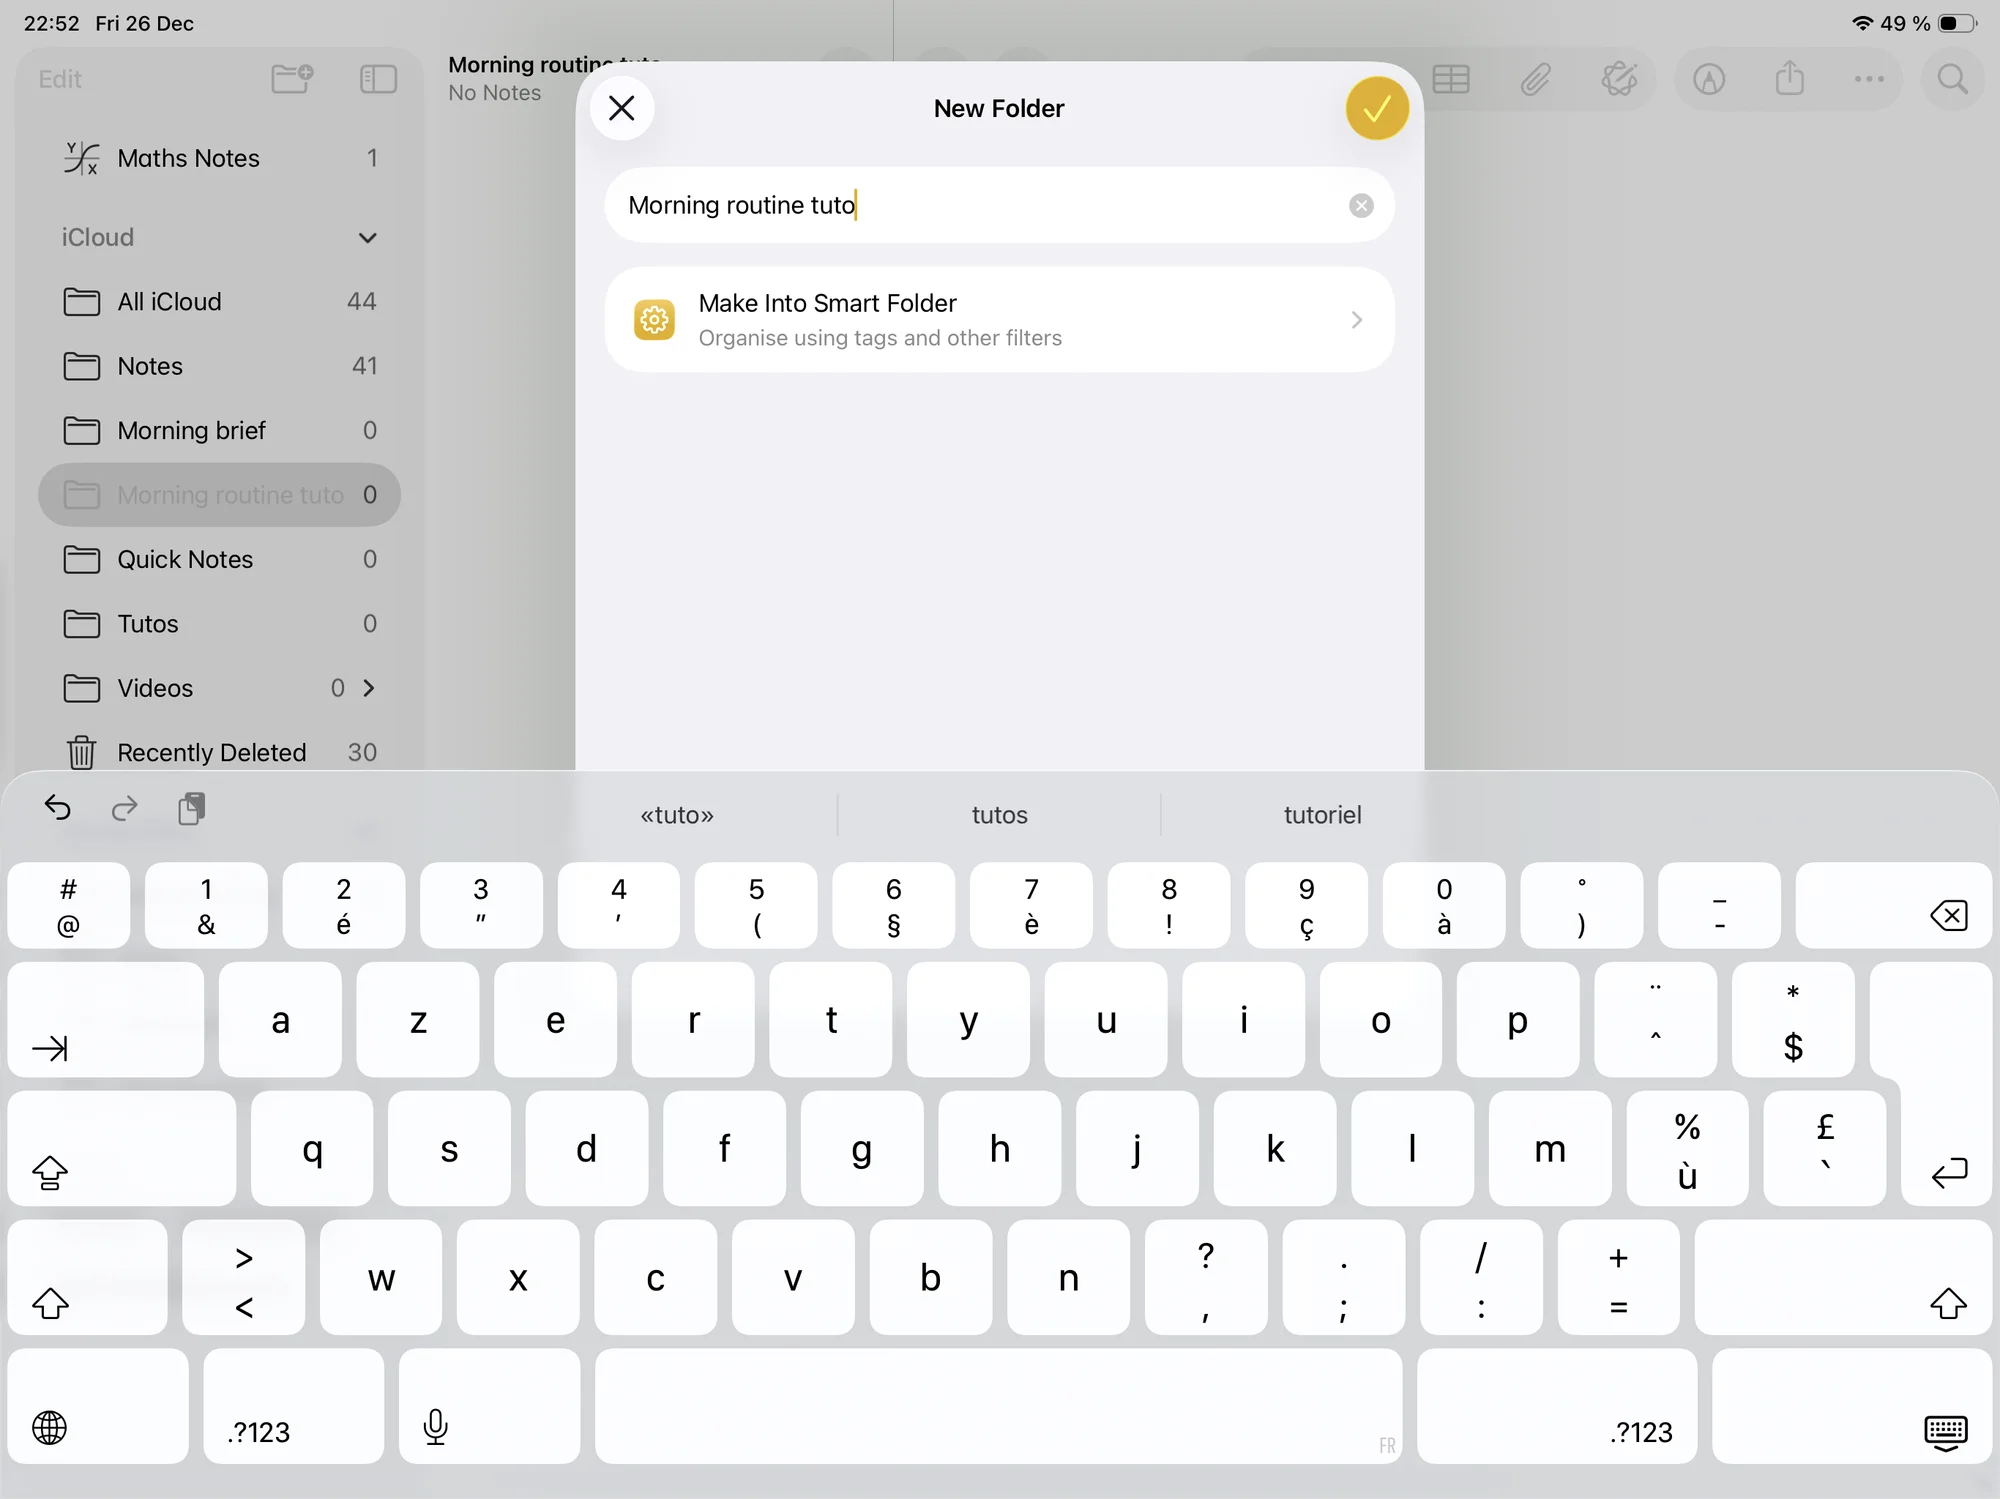
Naming the note
The goal of this step is to create a note name that is easy to find and based on a consistent pattern that we will use each time (to search for the note or delete it, for example). We will use a format such as “Morning brief + today’s date”. This way, each day will have its own note, making it easy to find the corresponding briefing. We therefore begin by retrieving the current date and formatting it:
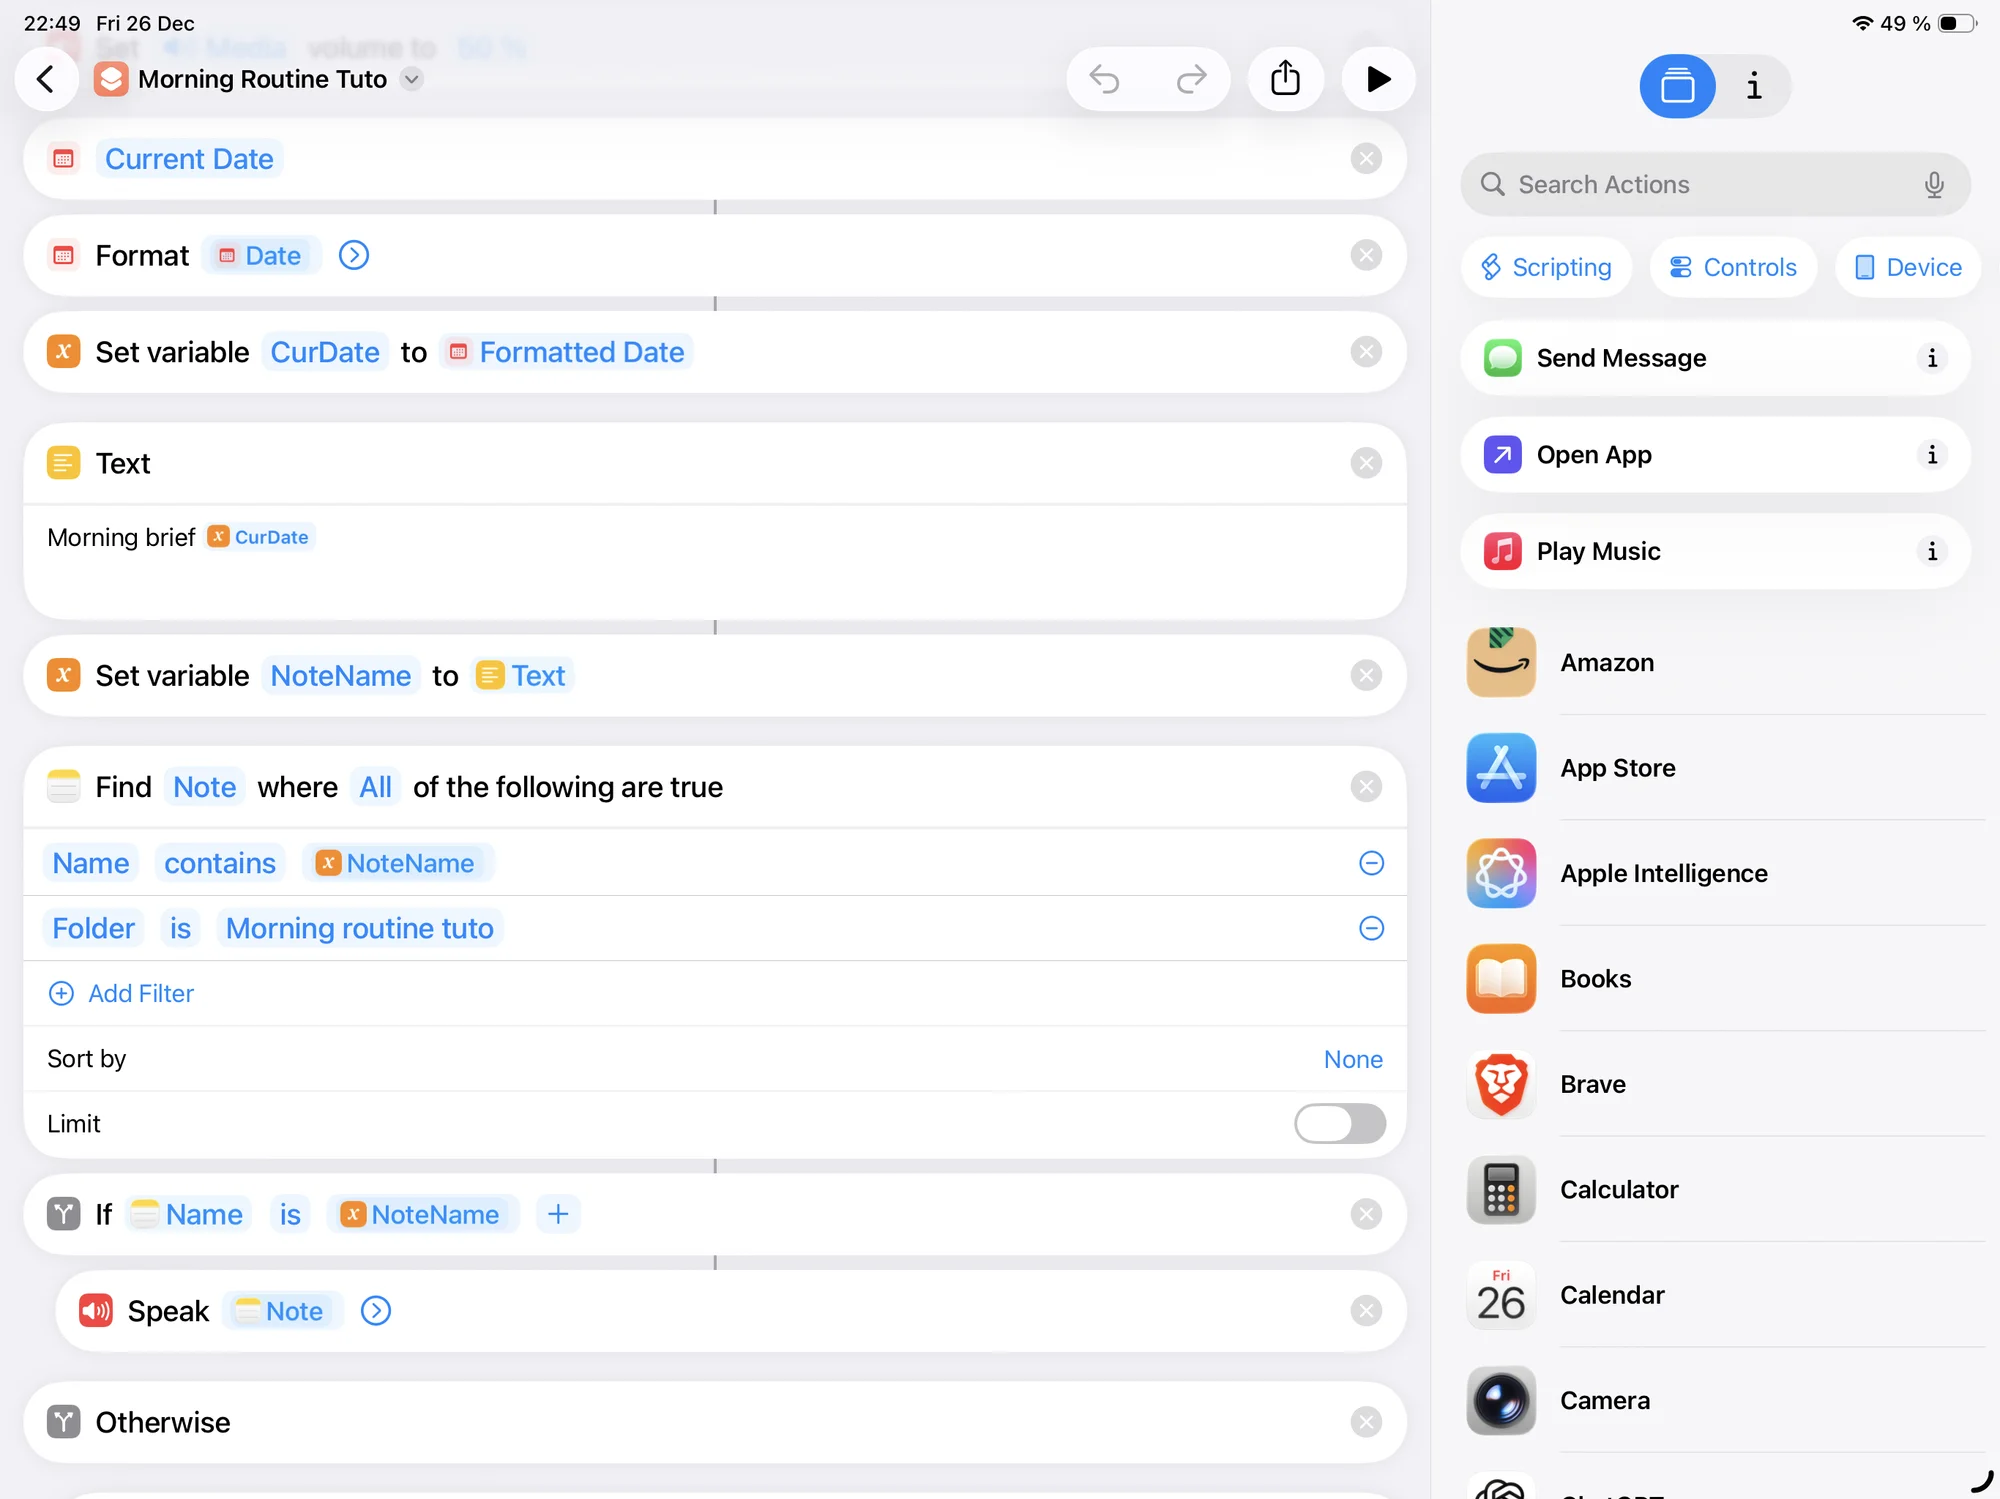
When formatting, we keep only the date (without the time) so that we always get the same name for the same day. If we included hours, minutes, or seconds, each execution would create a different name and therefore a new note. To access this option, simply click on “Date” in “Format”:
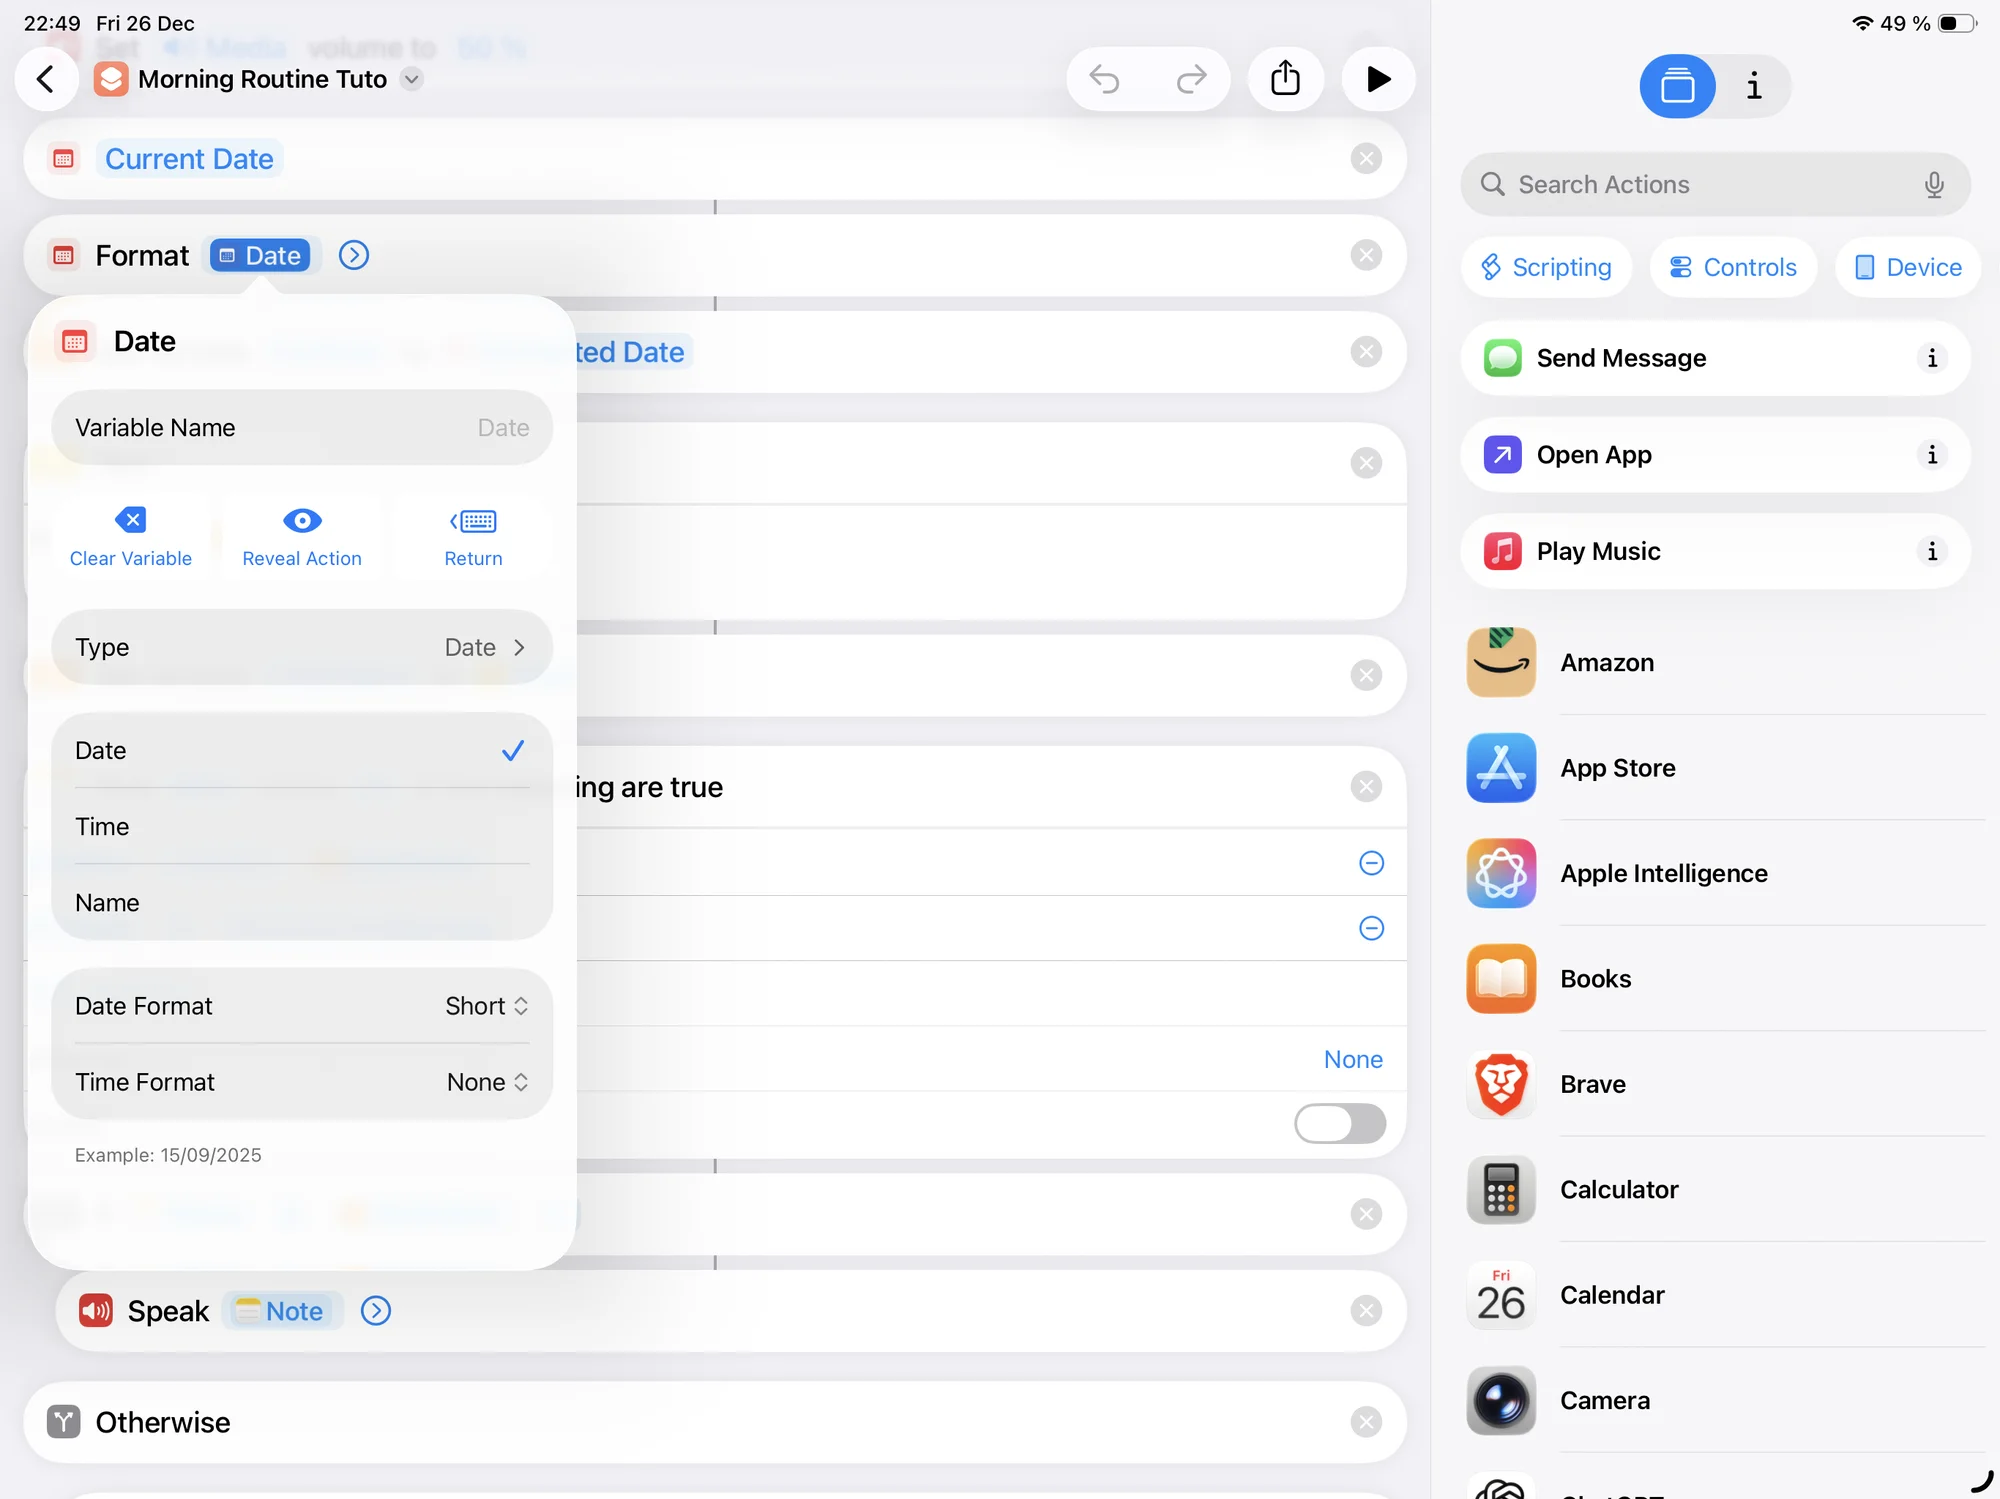
Once the date is correctly formatted, we store it in a variable so we can reuse it later. We can then build the note’s name. To do this, we create a text combining the prefix (“Morning brief”) and the current date, then save this result in a variable (see figure before).
Now that the name is ready, we can search for the corresponding note in our folders to check whether it already exists. If it does not, we will create it.
To perform this search, we use the “Find Notes” action.
Bug with the Find Notes function in iOS 26.1 and earlierUp to iOS 26.1, the “Find Notes” action had a malfunction on Mac: it did not seem to support the use of multiple filters (for example, filtering by both name and folder). On iPhone and iPad, however, everything worked normally. Since iOS 26.2, this issue appears to have been resolved.
In the “Find Notes” action, you must filter by both name and folder to avoid, for example, searching in the Deleted folder.
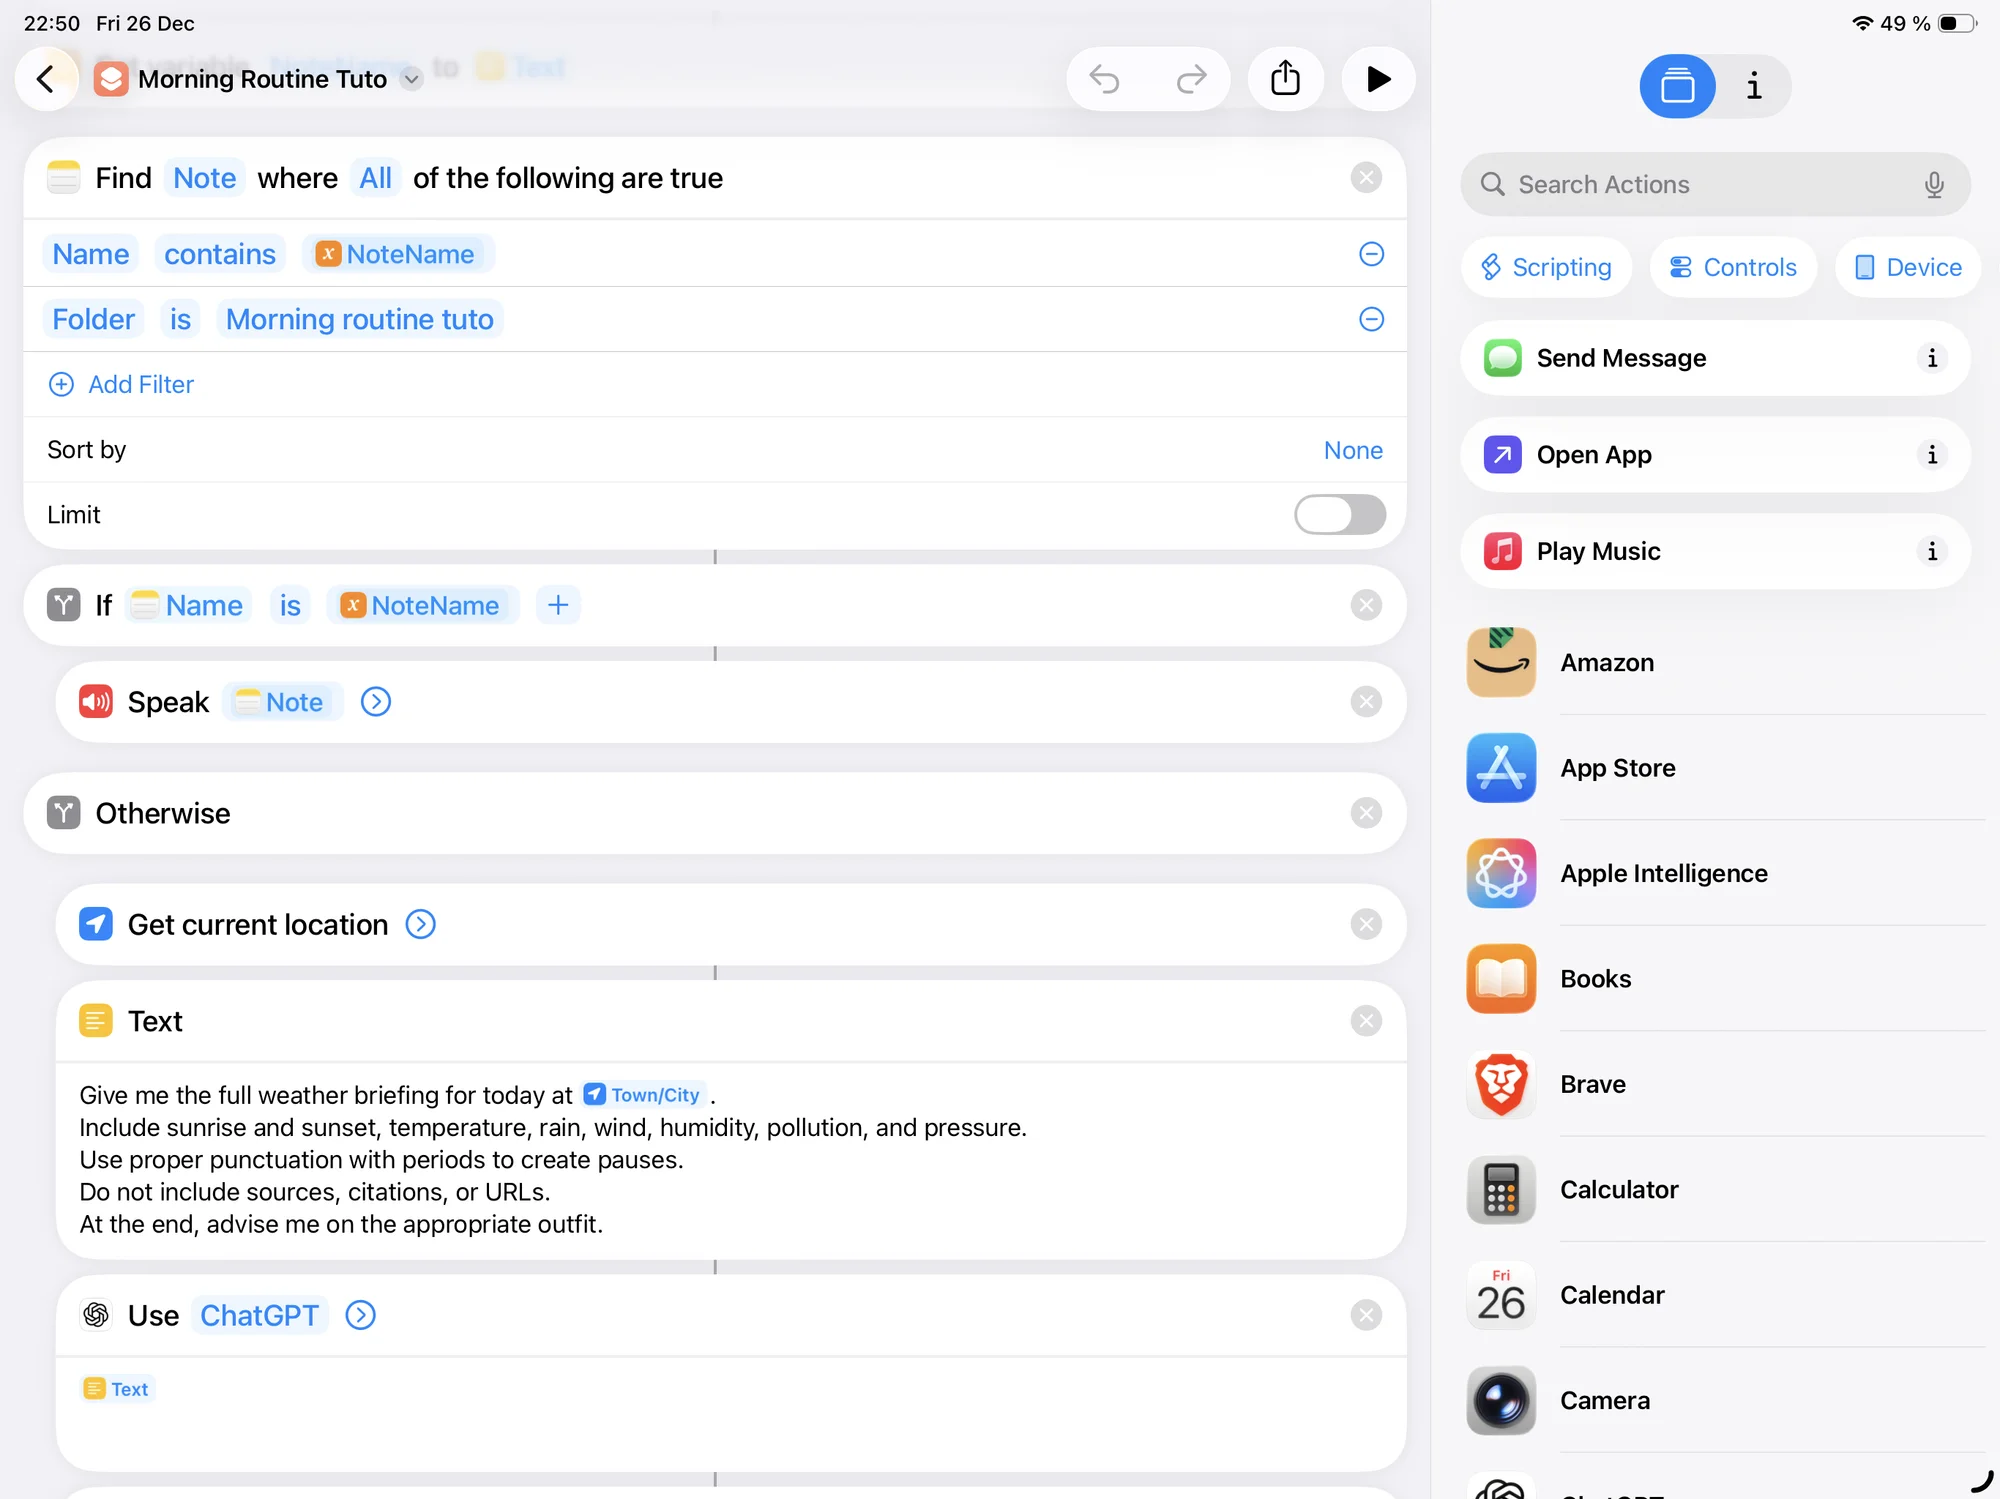
Once the search is performed, by adding an “If” condition and comparing the obtained name with the expected one, two cases may occur:
- The note already exists : in this case, the search function successfully found the note, and you simply need to ask Siri to read it.
- The note does not exist : in this case, it is the first time the routine is run, and the note must be created before continuing.
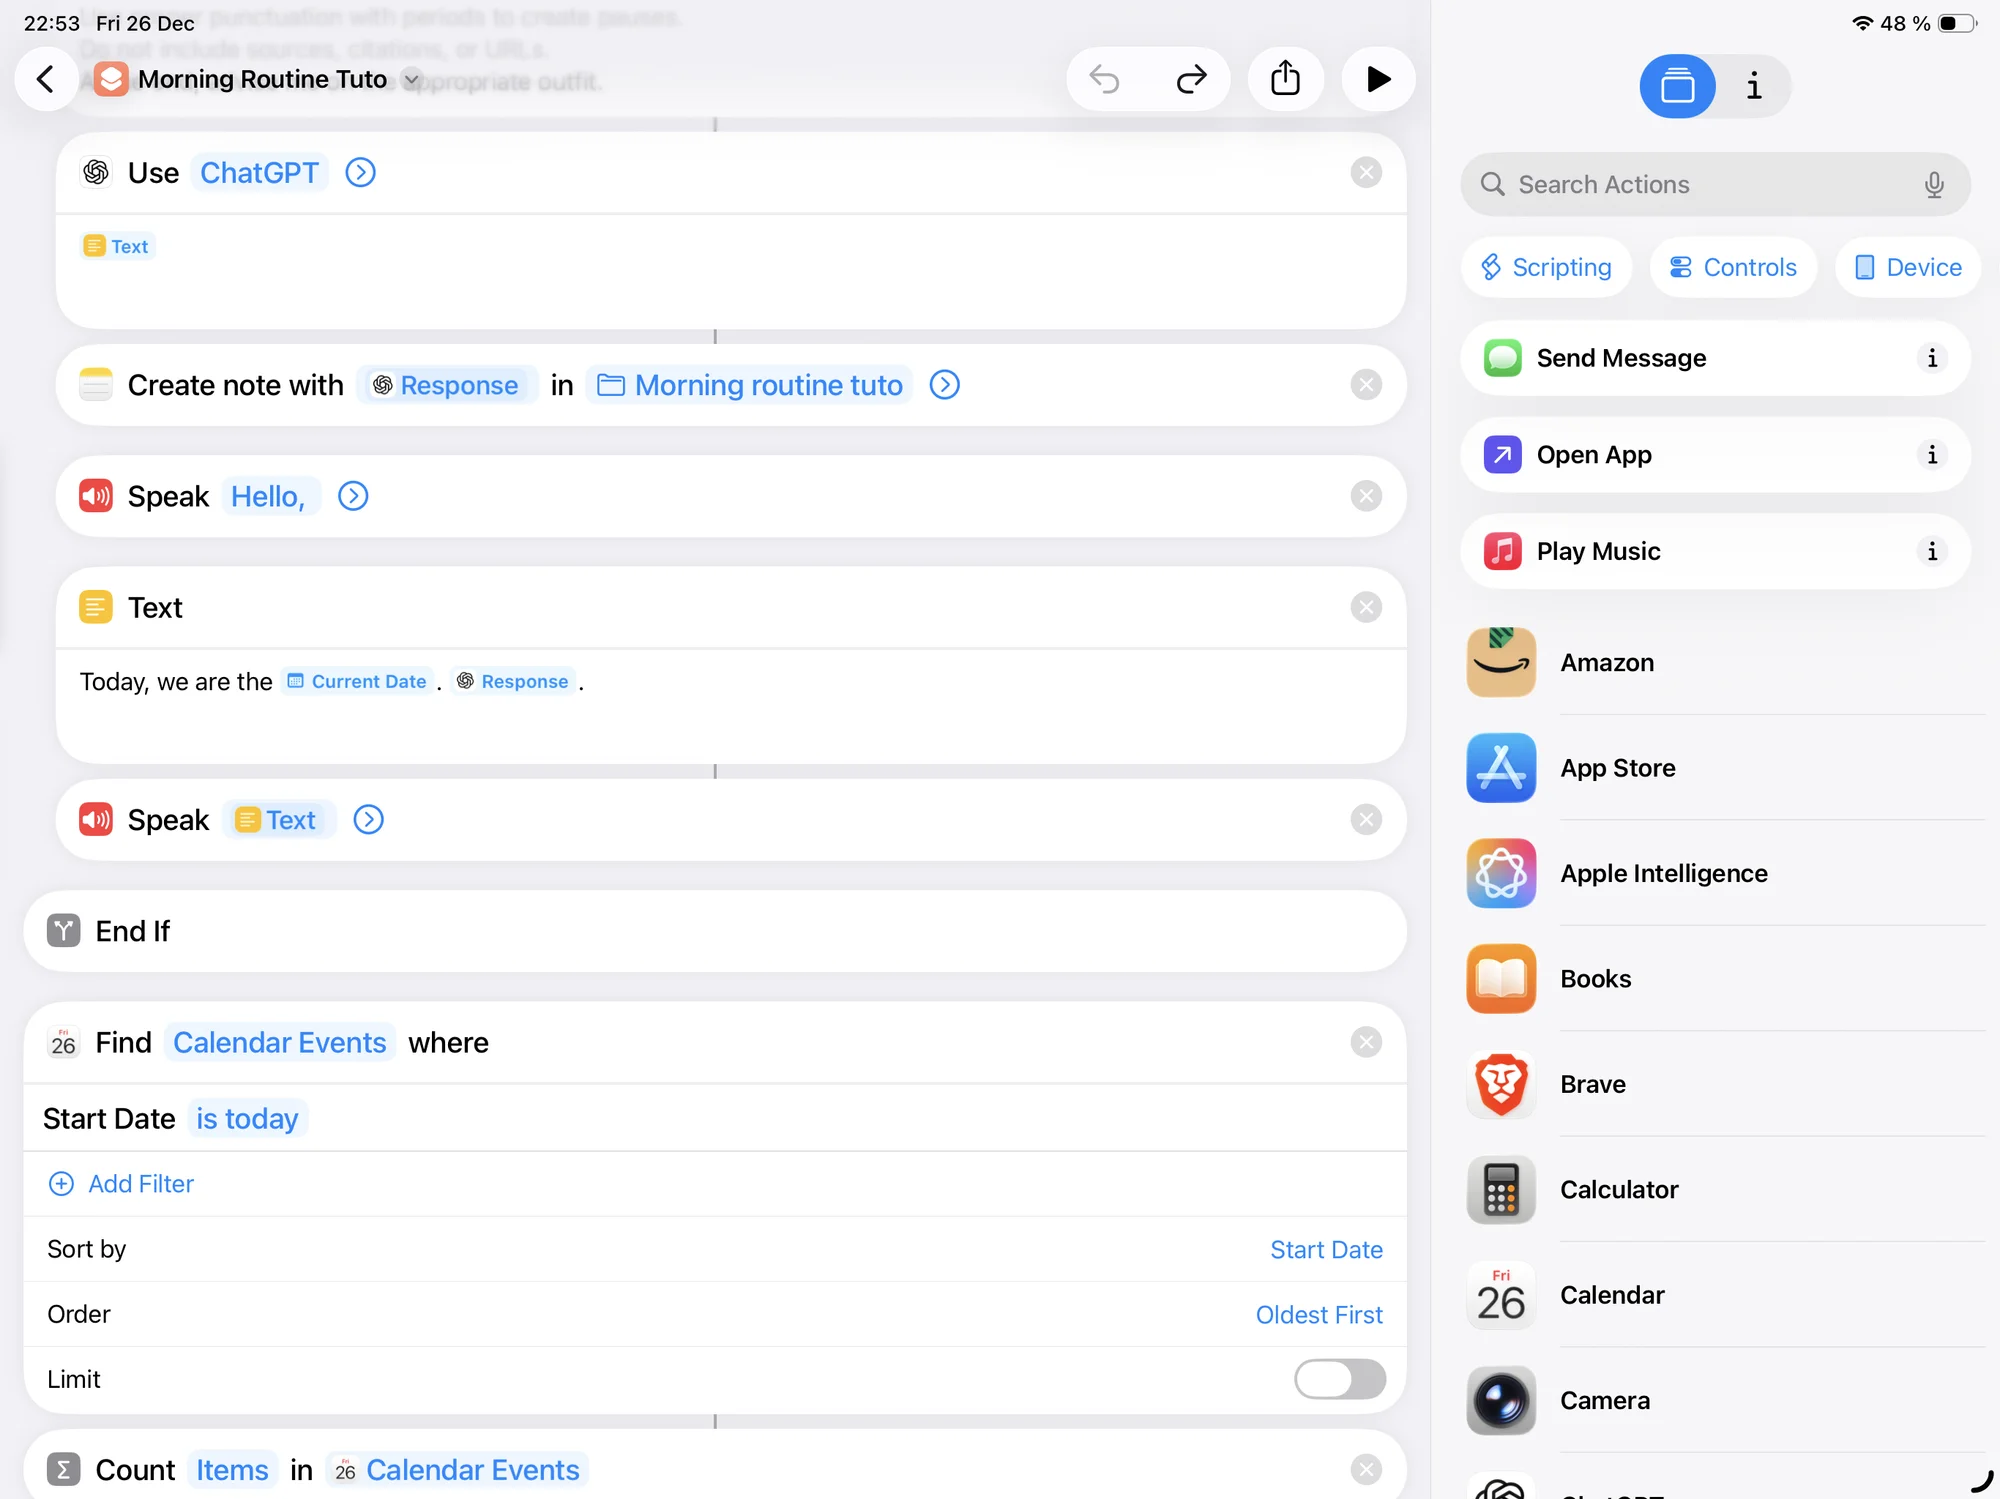
ChatGPT Prompt
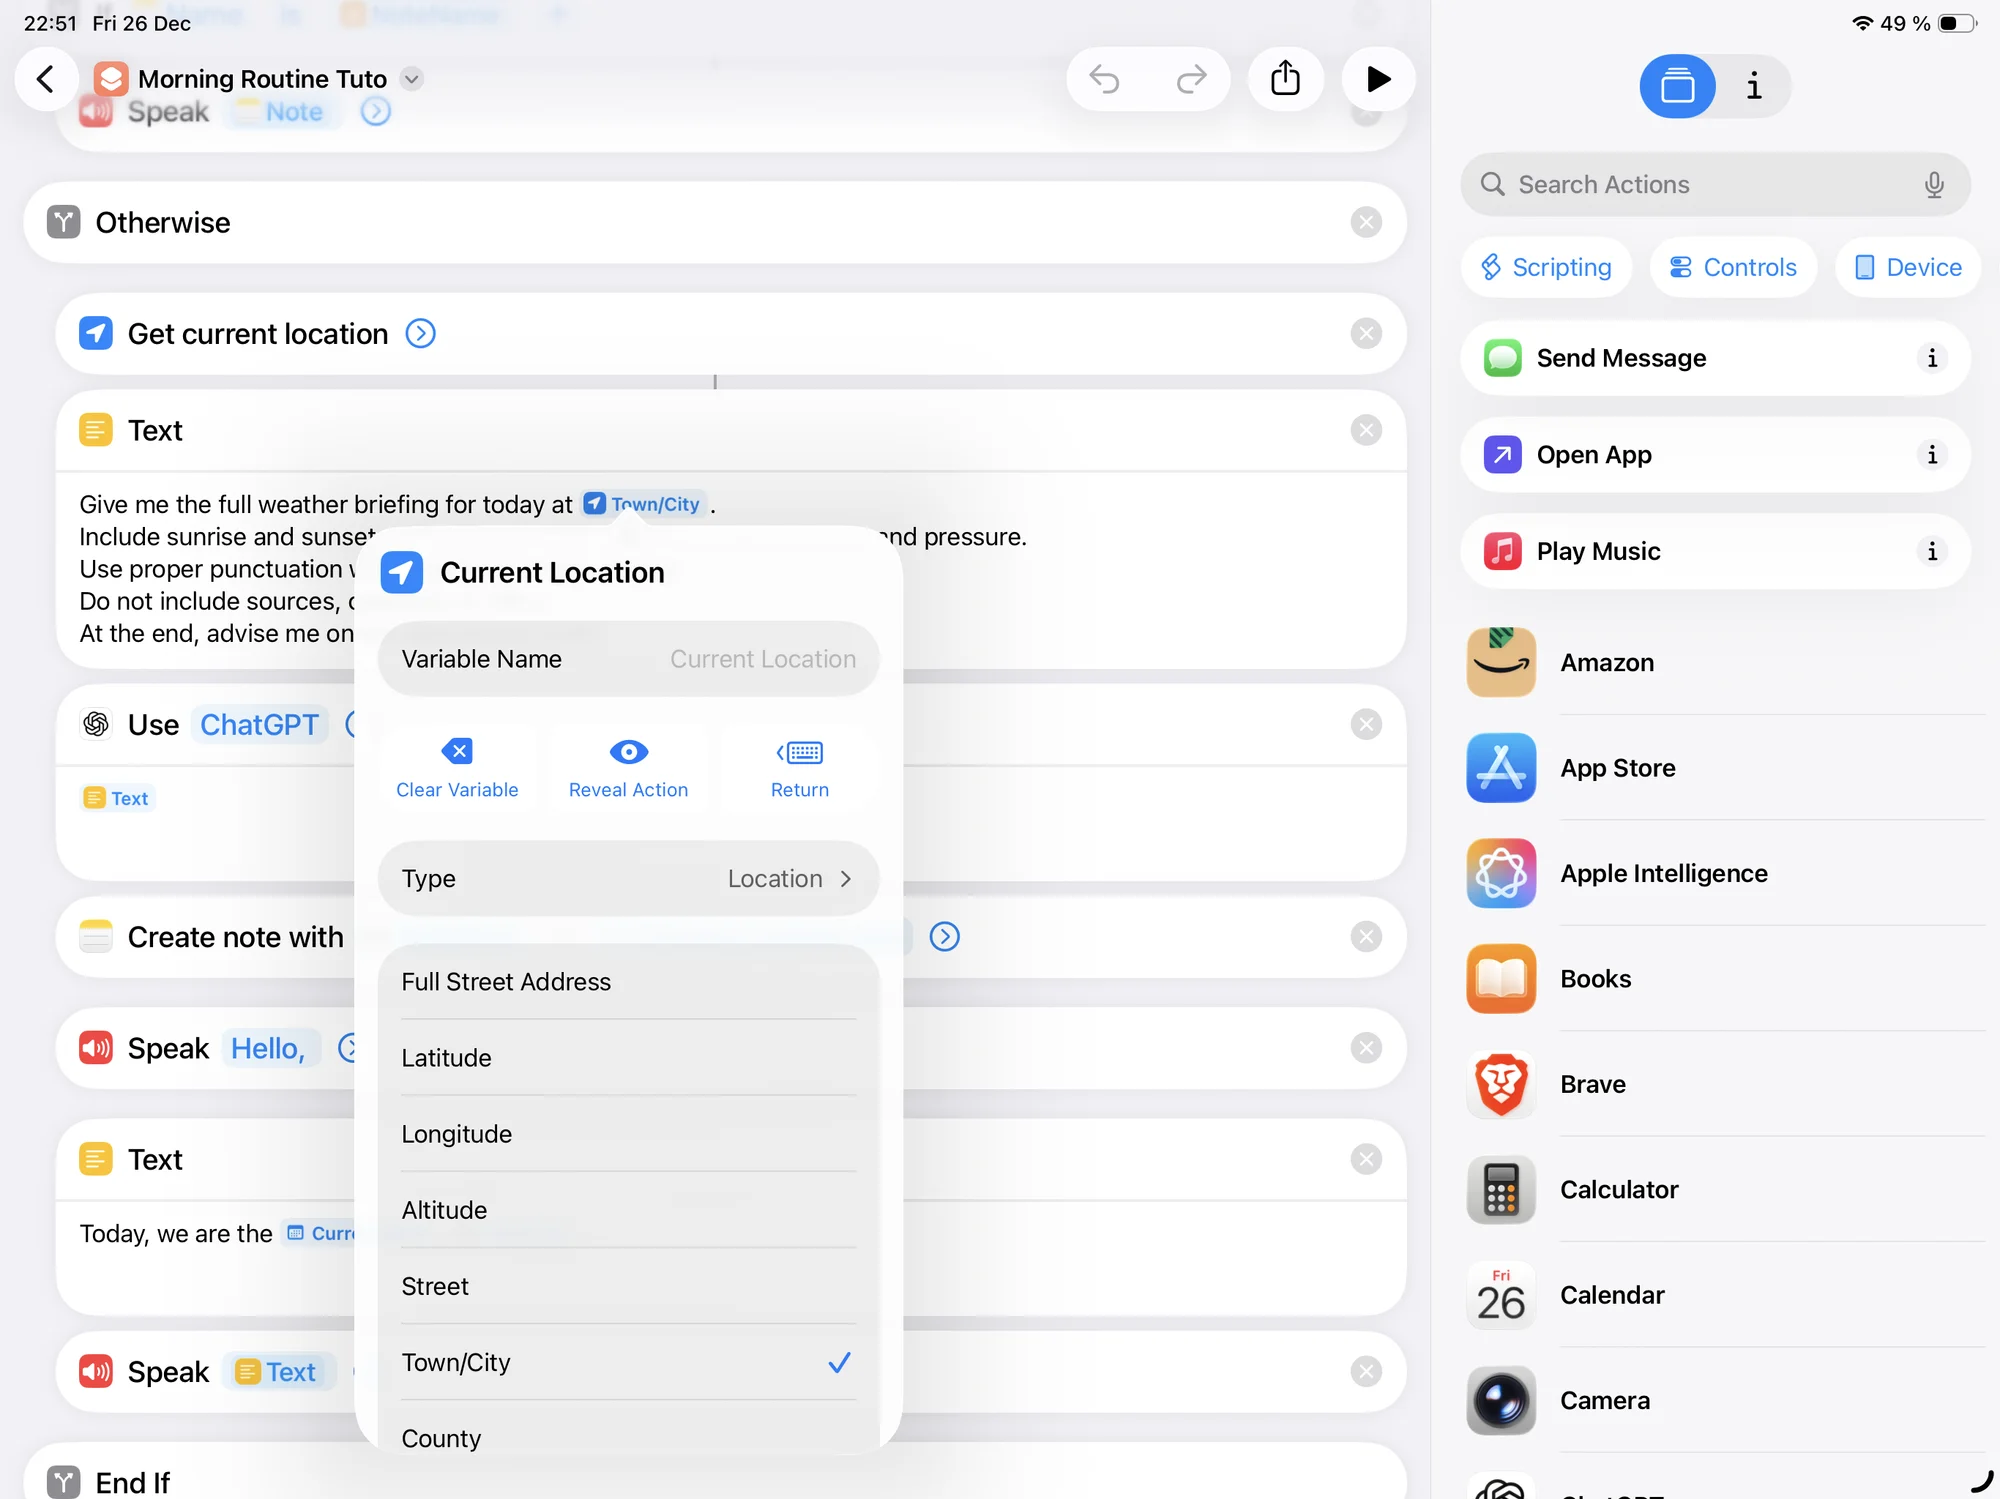
Before creating the note, we will first prepare the prompt that will be sent to ChatGPT. To do this, we automatically retrieve the city we are currently in and add it to the prompt text:
To use only the city name instead of the exact location, simply click on “Current Location” and select “City”:
This way, the prompt will automatically send your city name to ChatGPT.
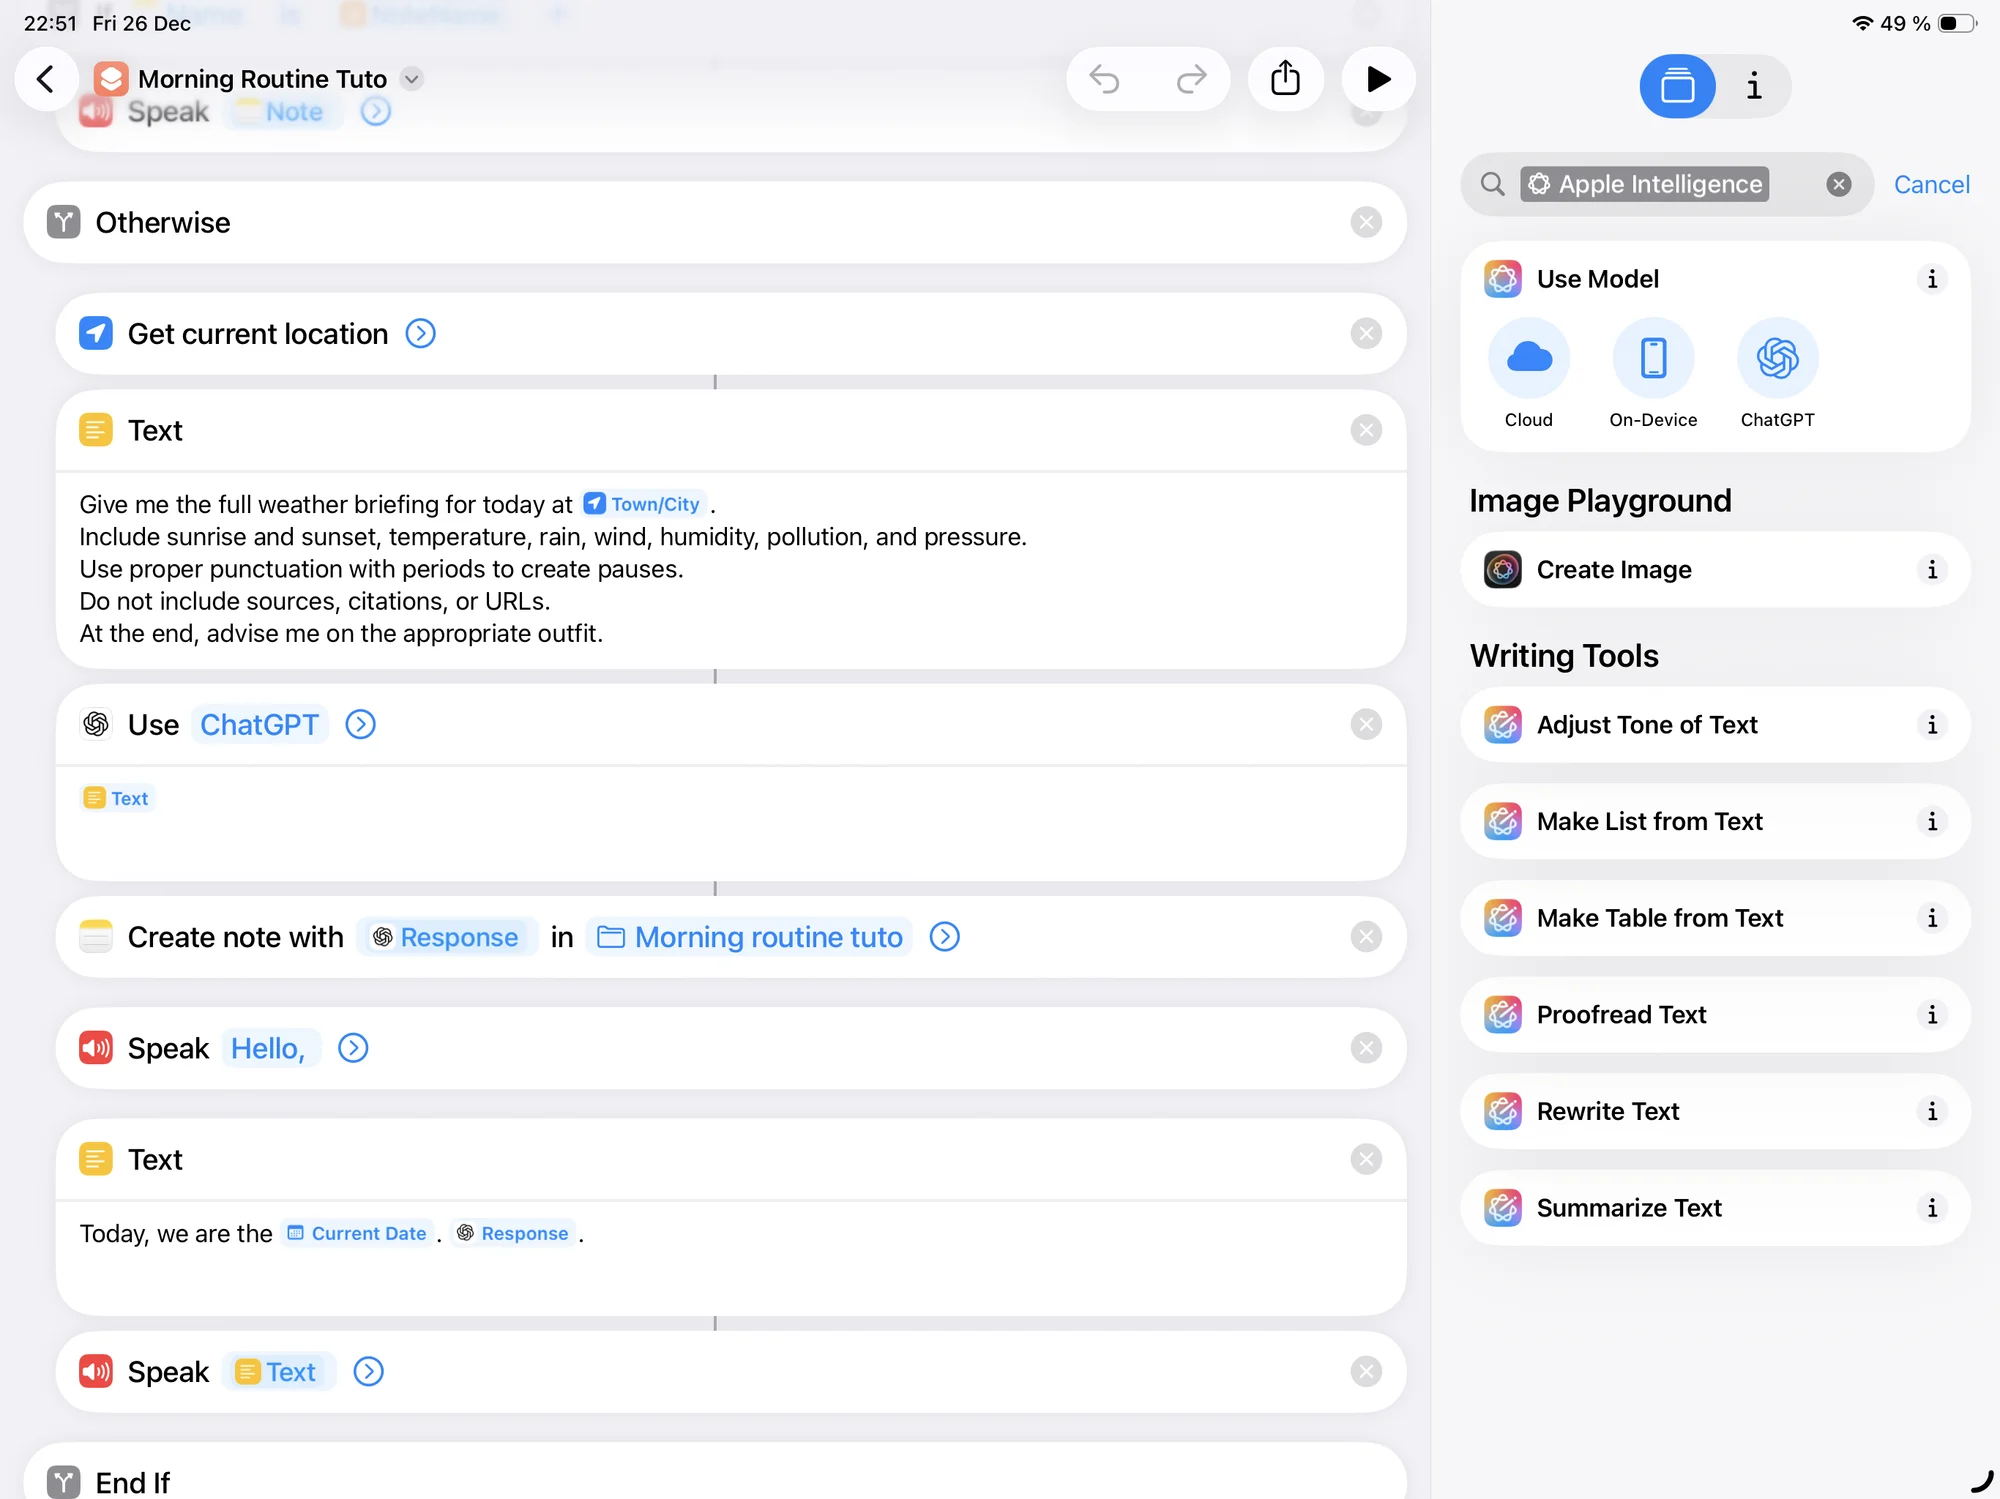
We use ChatGPT because Apple Intelligence is not yet fully functional (possibly due to restrictions in Europe).
To access ChatGPT in Shortcuts, open the “Apple Intelligence” block and select the “ChatGPT” model:
The prompt I use contains the information that is useful for me, but you can of course adapt it to your needs. I specifically ask ChatGPT to pay attention to punctuation, as Siri sometimes reads everything in a single breath, which is not very pleasant. I also specify not to include sources or URLs for the same reasons.
Saving and reading
Now that the prompt is ready, we will create the folder in which the note will be saved. To do this, open the Notes app, create a new iCloud folder, and give it a name:
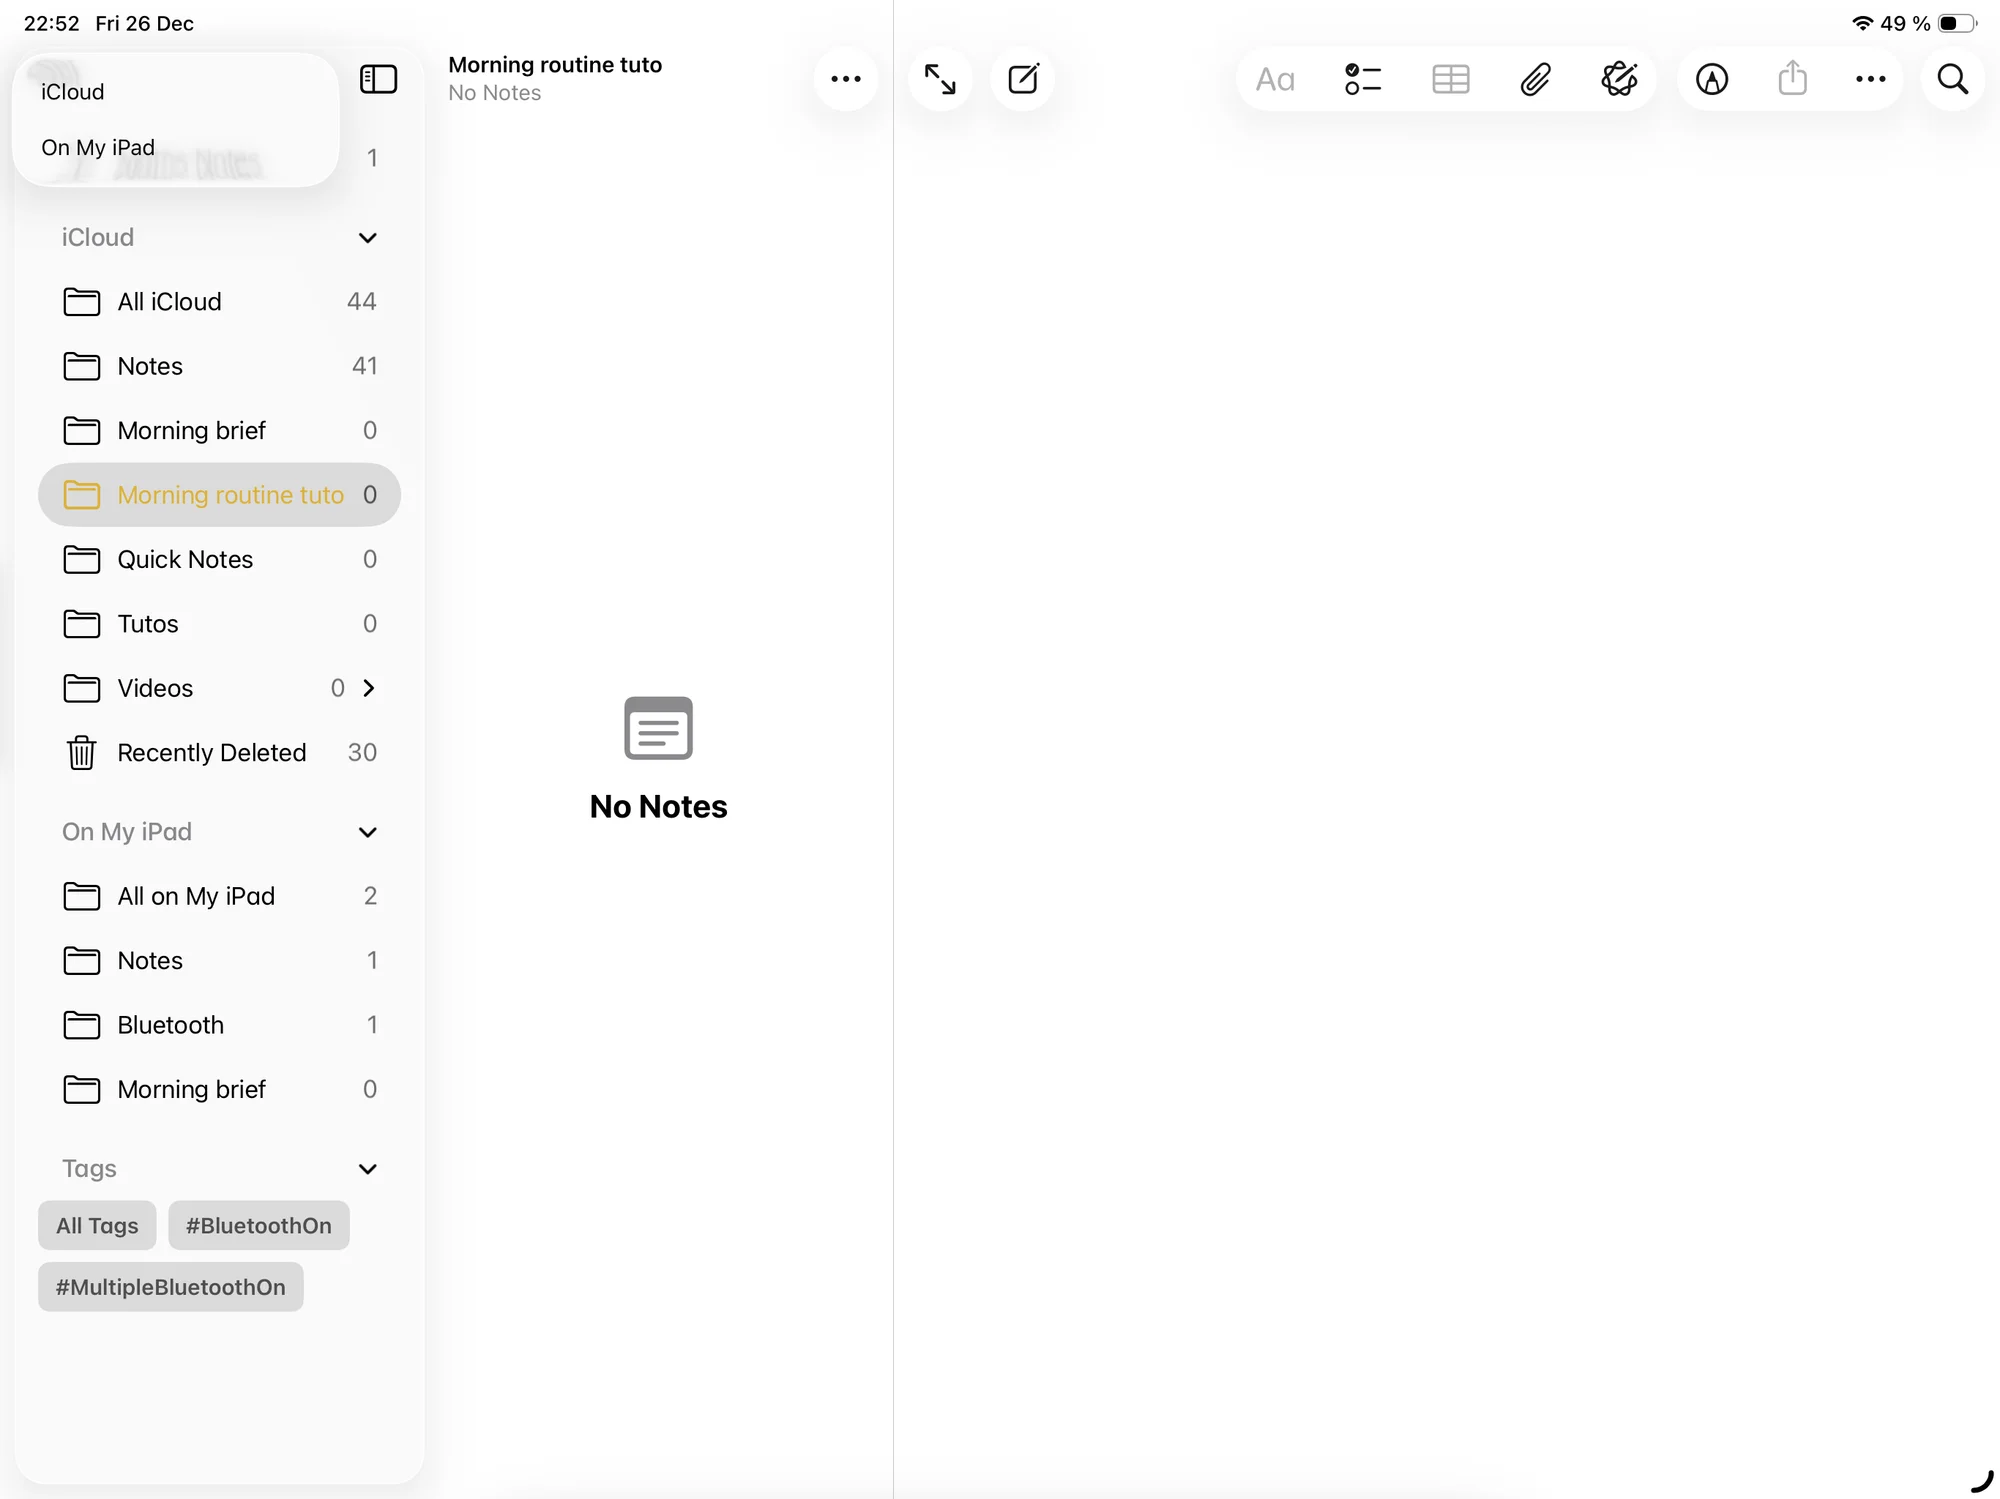
The folder is placed in iCloud so that the note can be synchronized across all devices.
Once this step is completed, we can send the request to ChatGPT, retrieve the response, and then create the corresponding note:
All that remains is to ask Siri to read the note. Just make sure to save the note before starting the reading so that if you interrupt it, the note is already saved:
At this stage, the routine is already functional. If you want, you can test it by pressing the “Play” button at the bottom of the screen.
Bonus 1: Adding calendar events
As a first bonus, we can integrate calendar events in order to know, from the morning, what is planned for the day. For this part, I was inspired by a YouTuber: https://youtu.be/__ISEHpXgHI I couldn’t find that video, but this one covers the same topic.).
We start by searching for all the day’s events in the calendar:
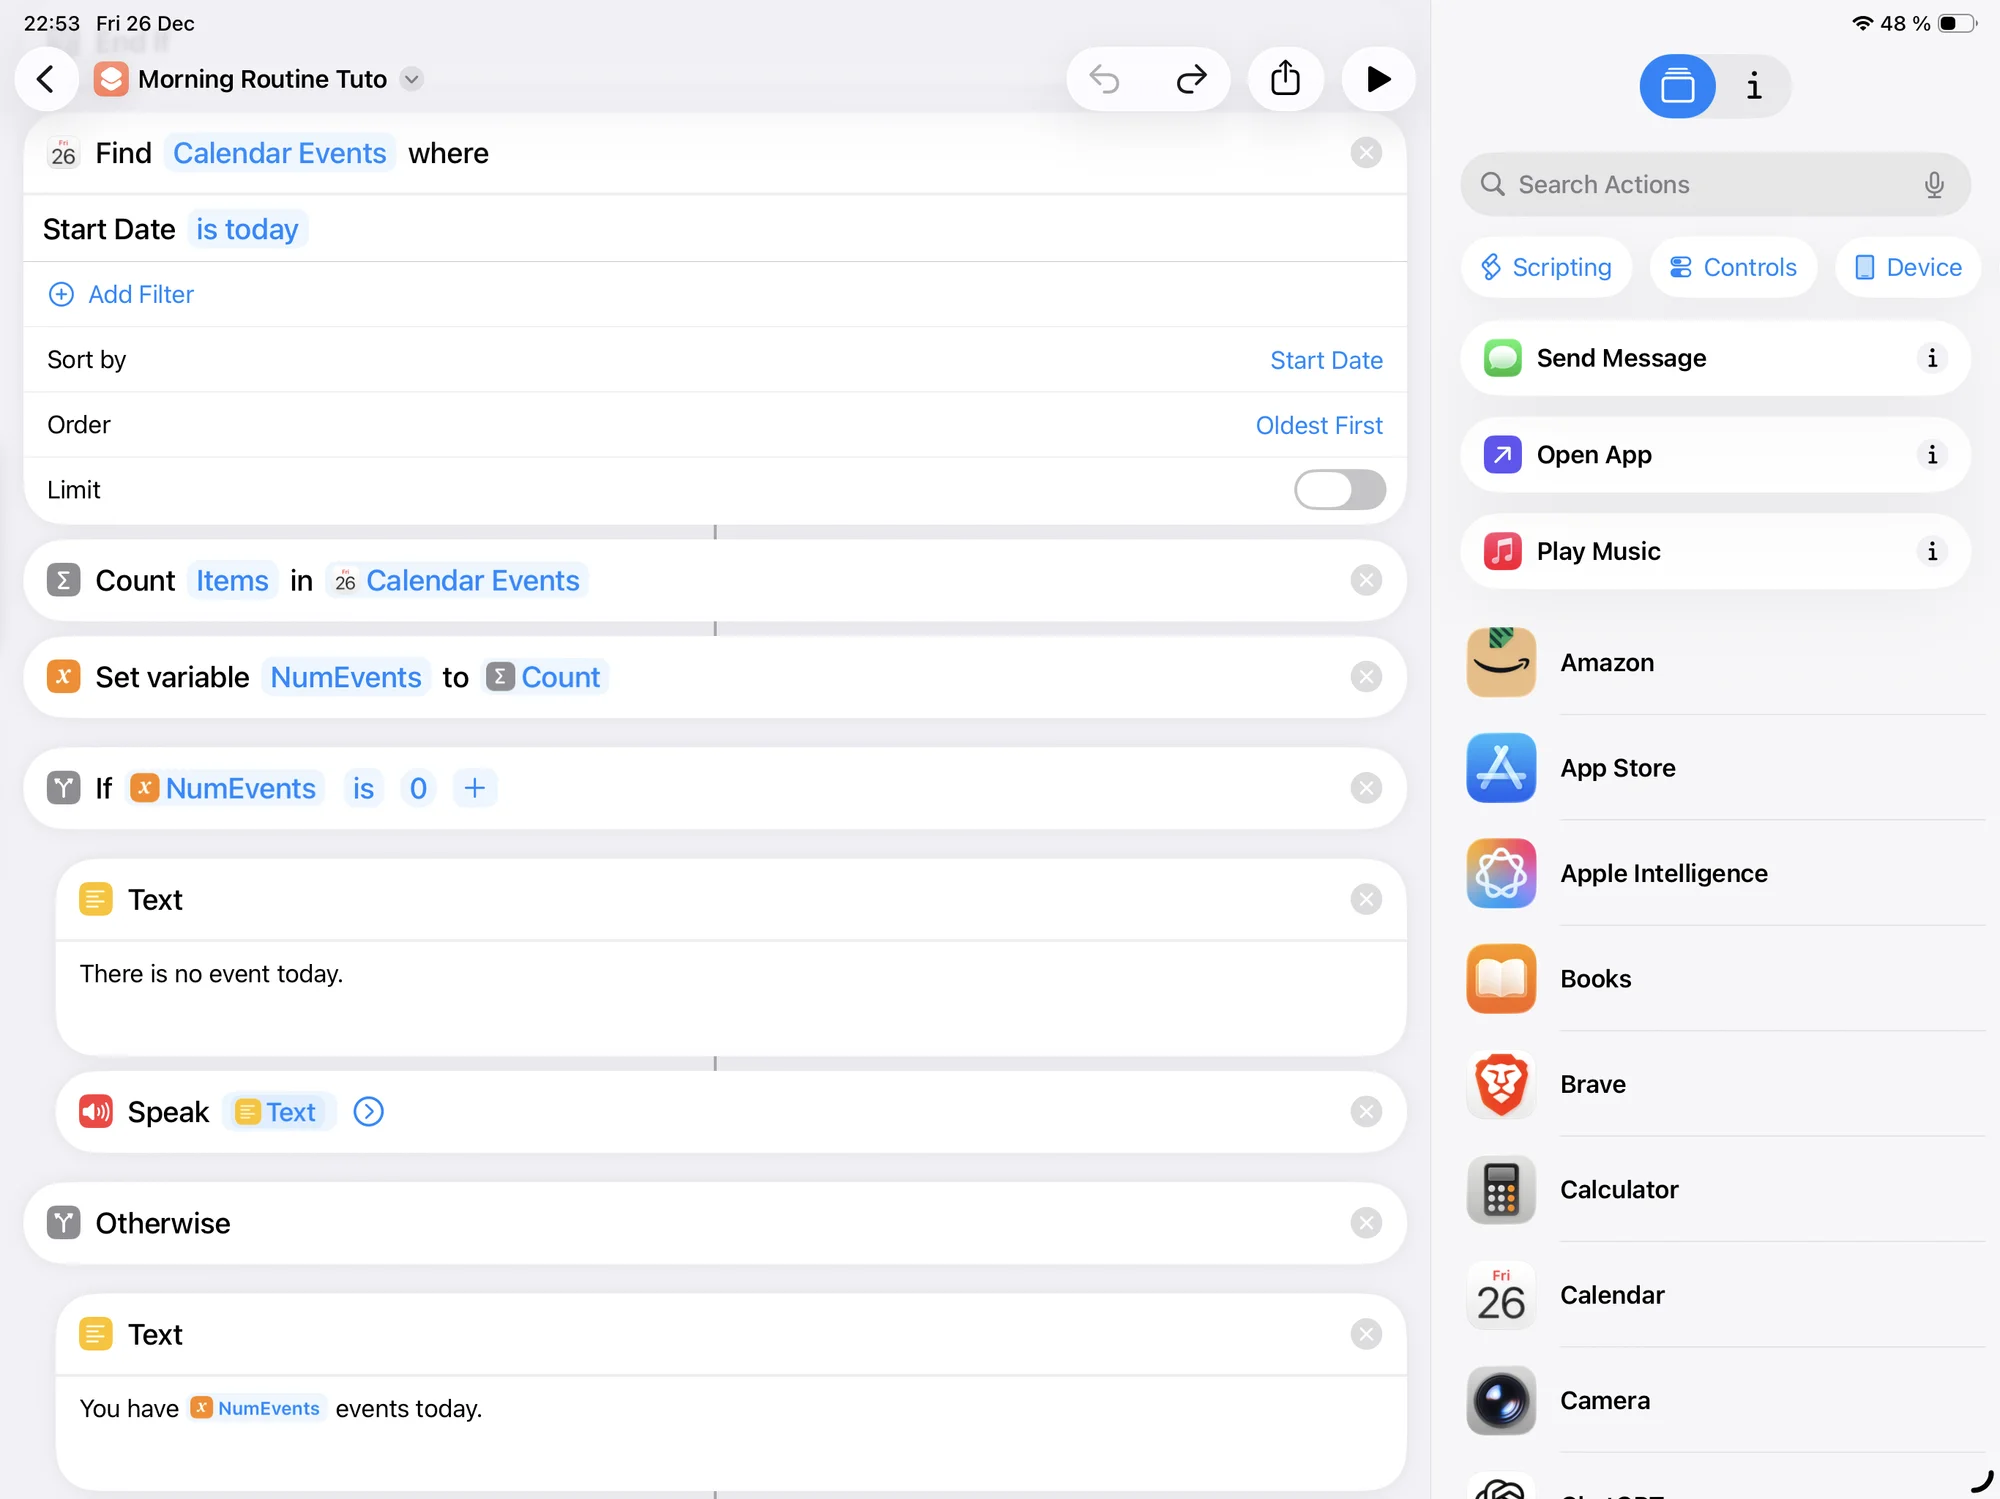
Once the list is obtained, we count the number of events so that Siri can announce it. The result is then stored in a variable so it can be reused easily.
We then check whether this number is equal to zero.
• If there are no events, Siri simply reads that there are no events scheduled today. • If there are events, Siri begins by announcing their number: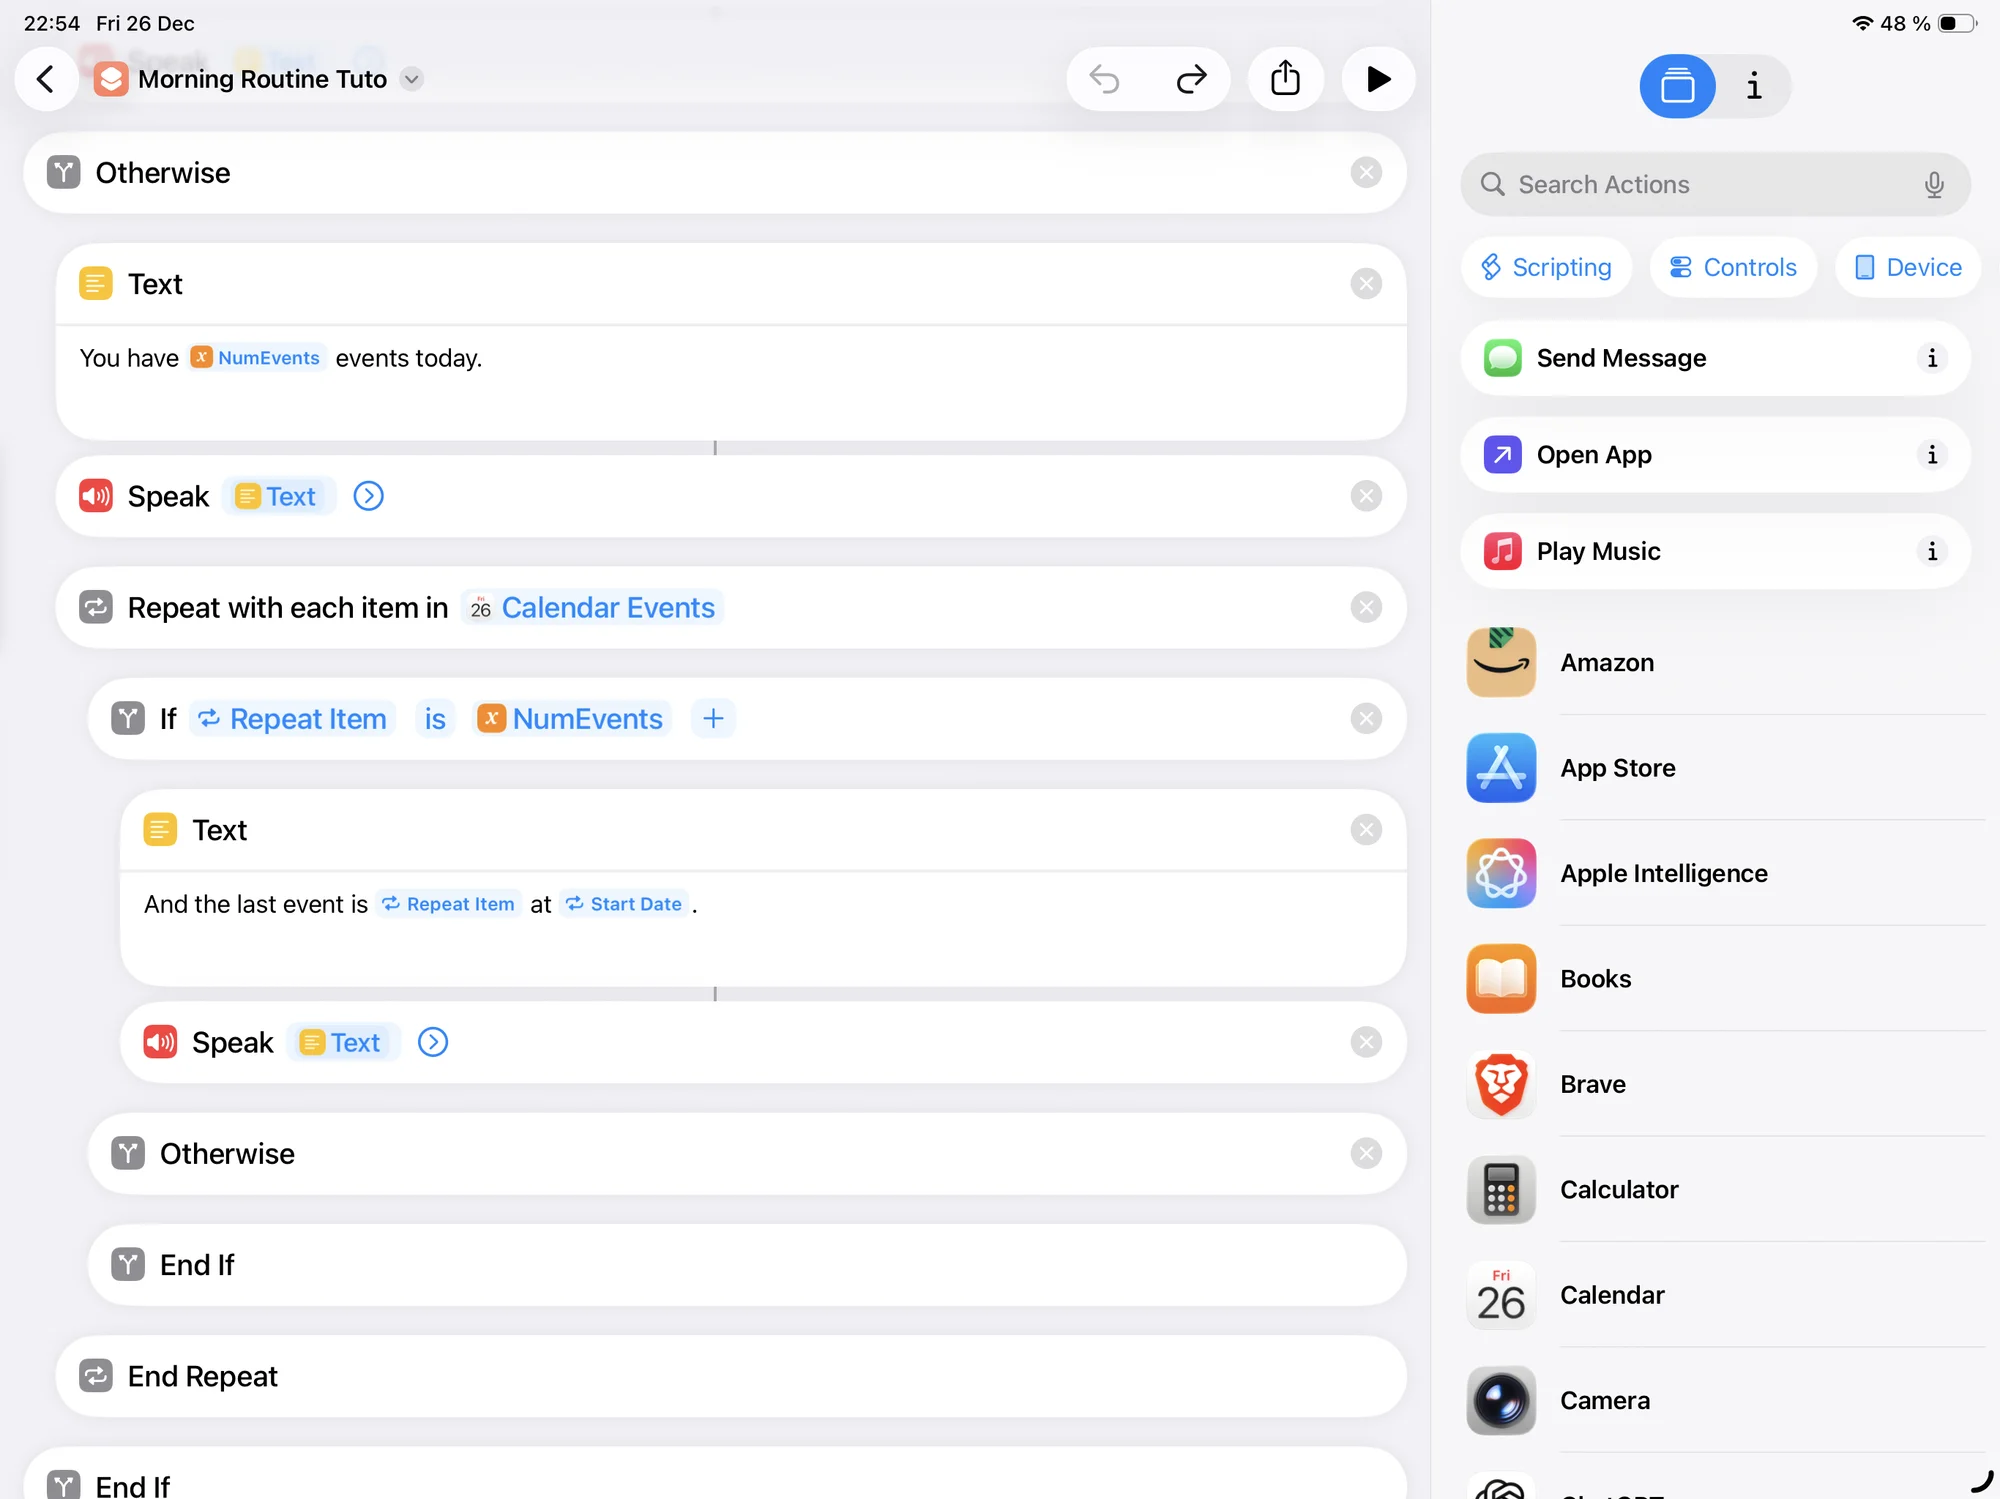
If events are present, we then go through the list using a loop. For each event, we check whether it is the last one of the day (which allows us to add a small nuance in the phrasing). Siri then reads the name of the event as well as its start time.
When there are events, we take the event and the event’s start time. To retrieve the time, simply select the repetition item and choose “Start Date”. When the event is not the last one, Siri simply reads its name and time.
In the continuity of this logic, we can also add reminders.
Bonus 2: Adding reminders
As with calendar events, we can also integrate the day’s reminders in order to obtain a complete briefing.
We start by searching for all reminders scheduled for the day, then we count their number so that Siri can announce it:
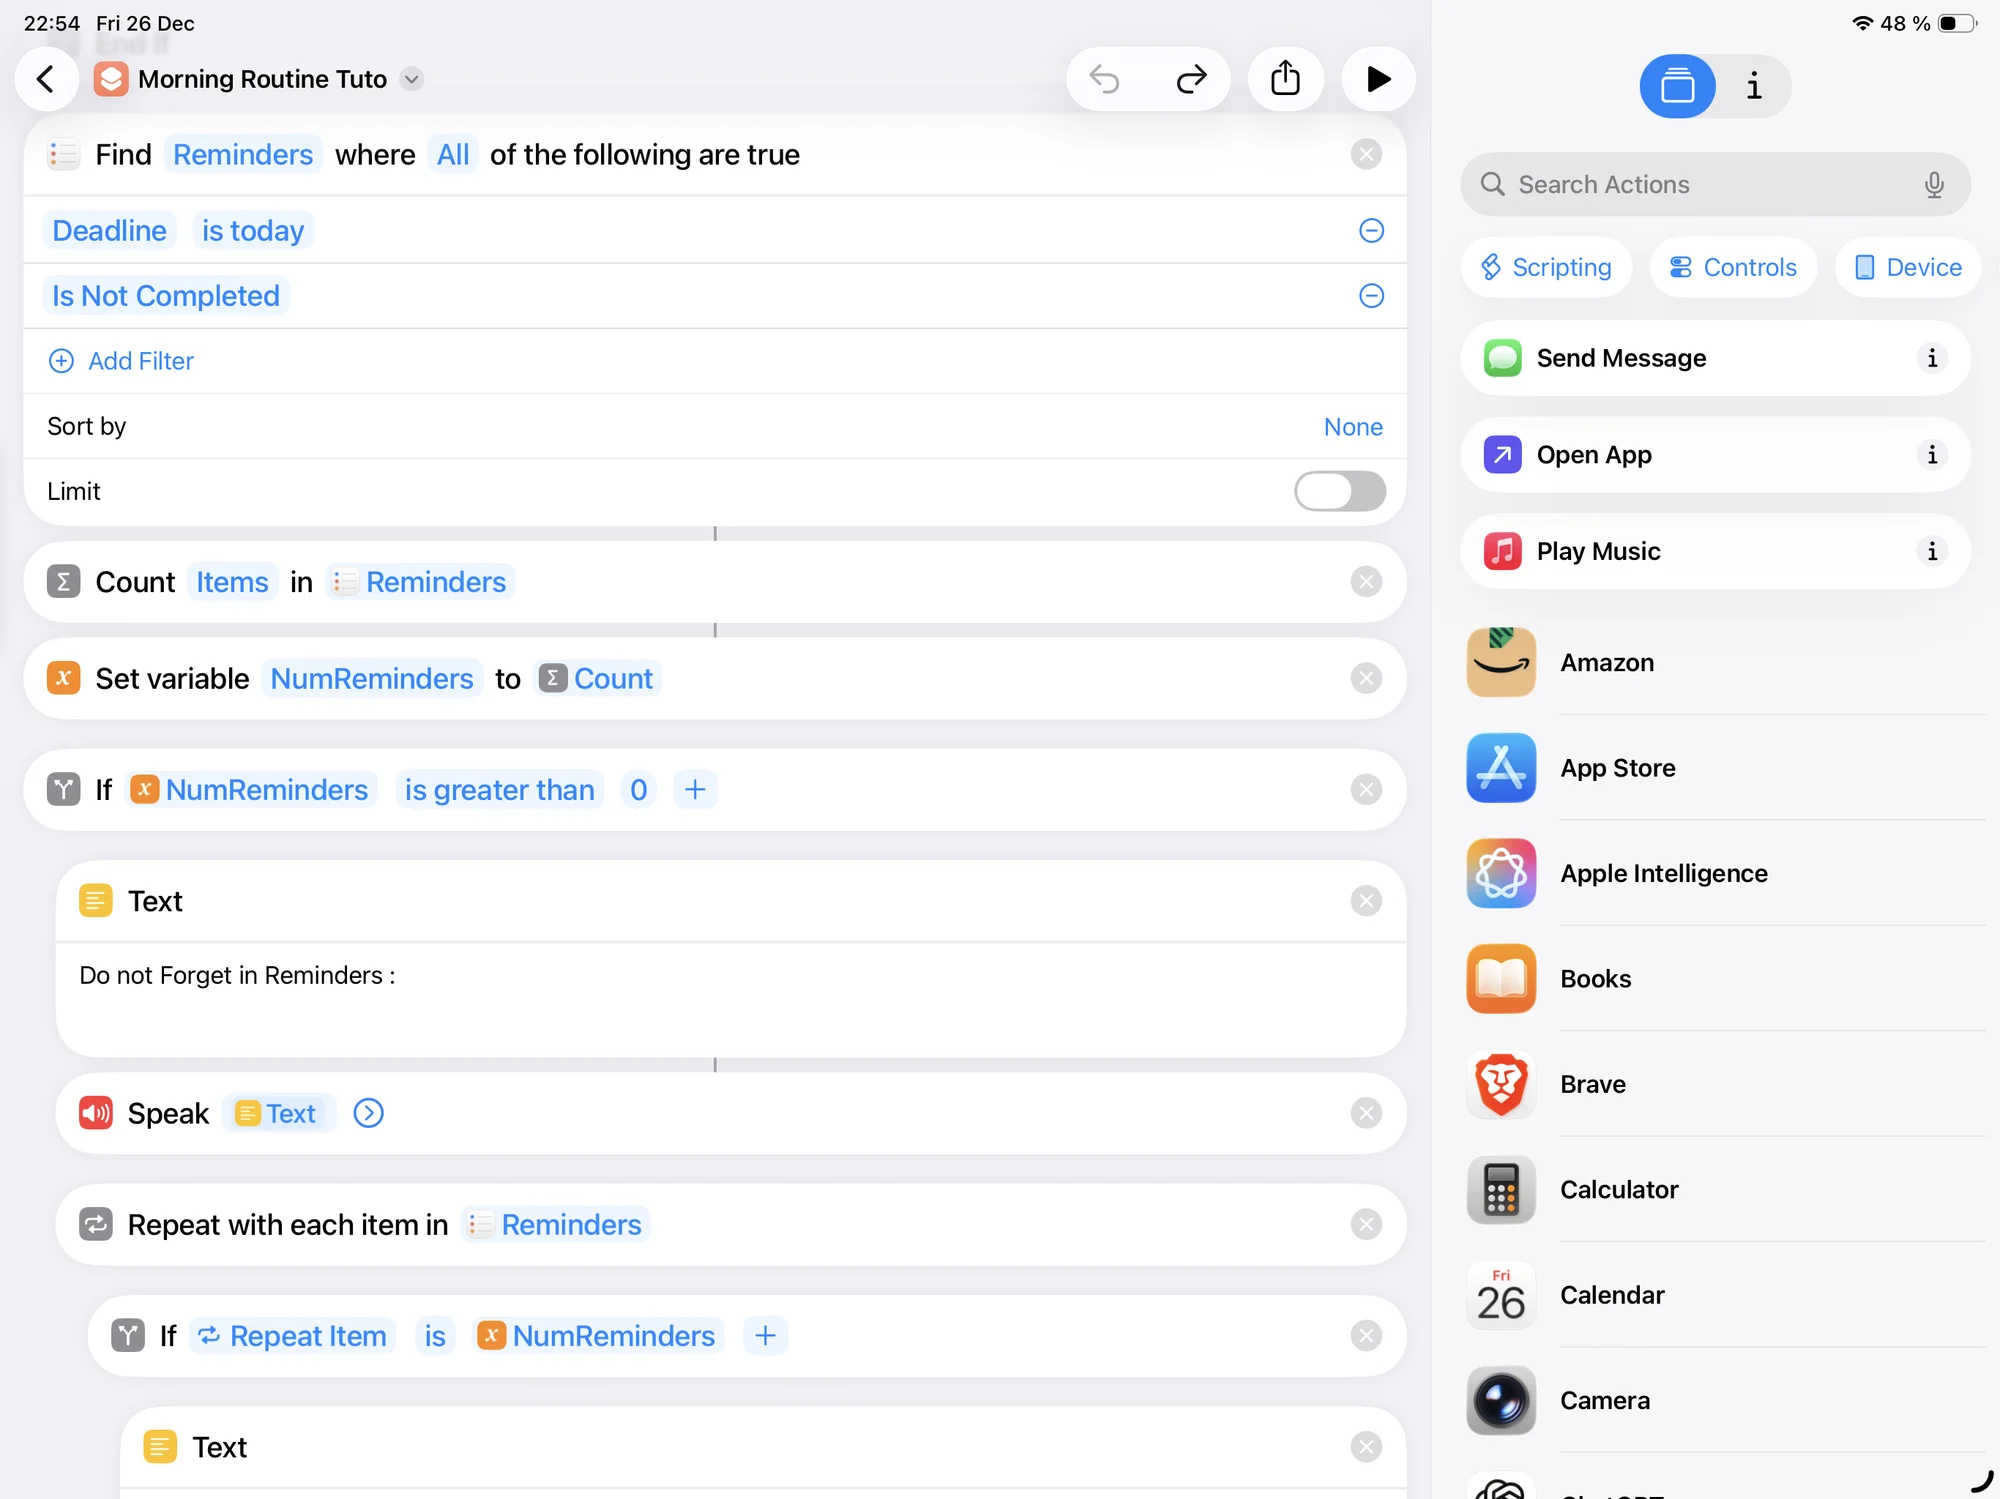
Once this result is obtained, we store it in a variable so it can be reused easily if needed.
If the number of reminders is greater than zero, Siri first reads an introductory sentence such as: “Don’t forget in the reminders: ”, then we go through each reminder using a loop:
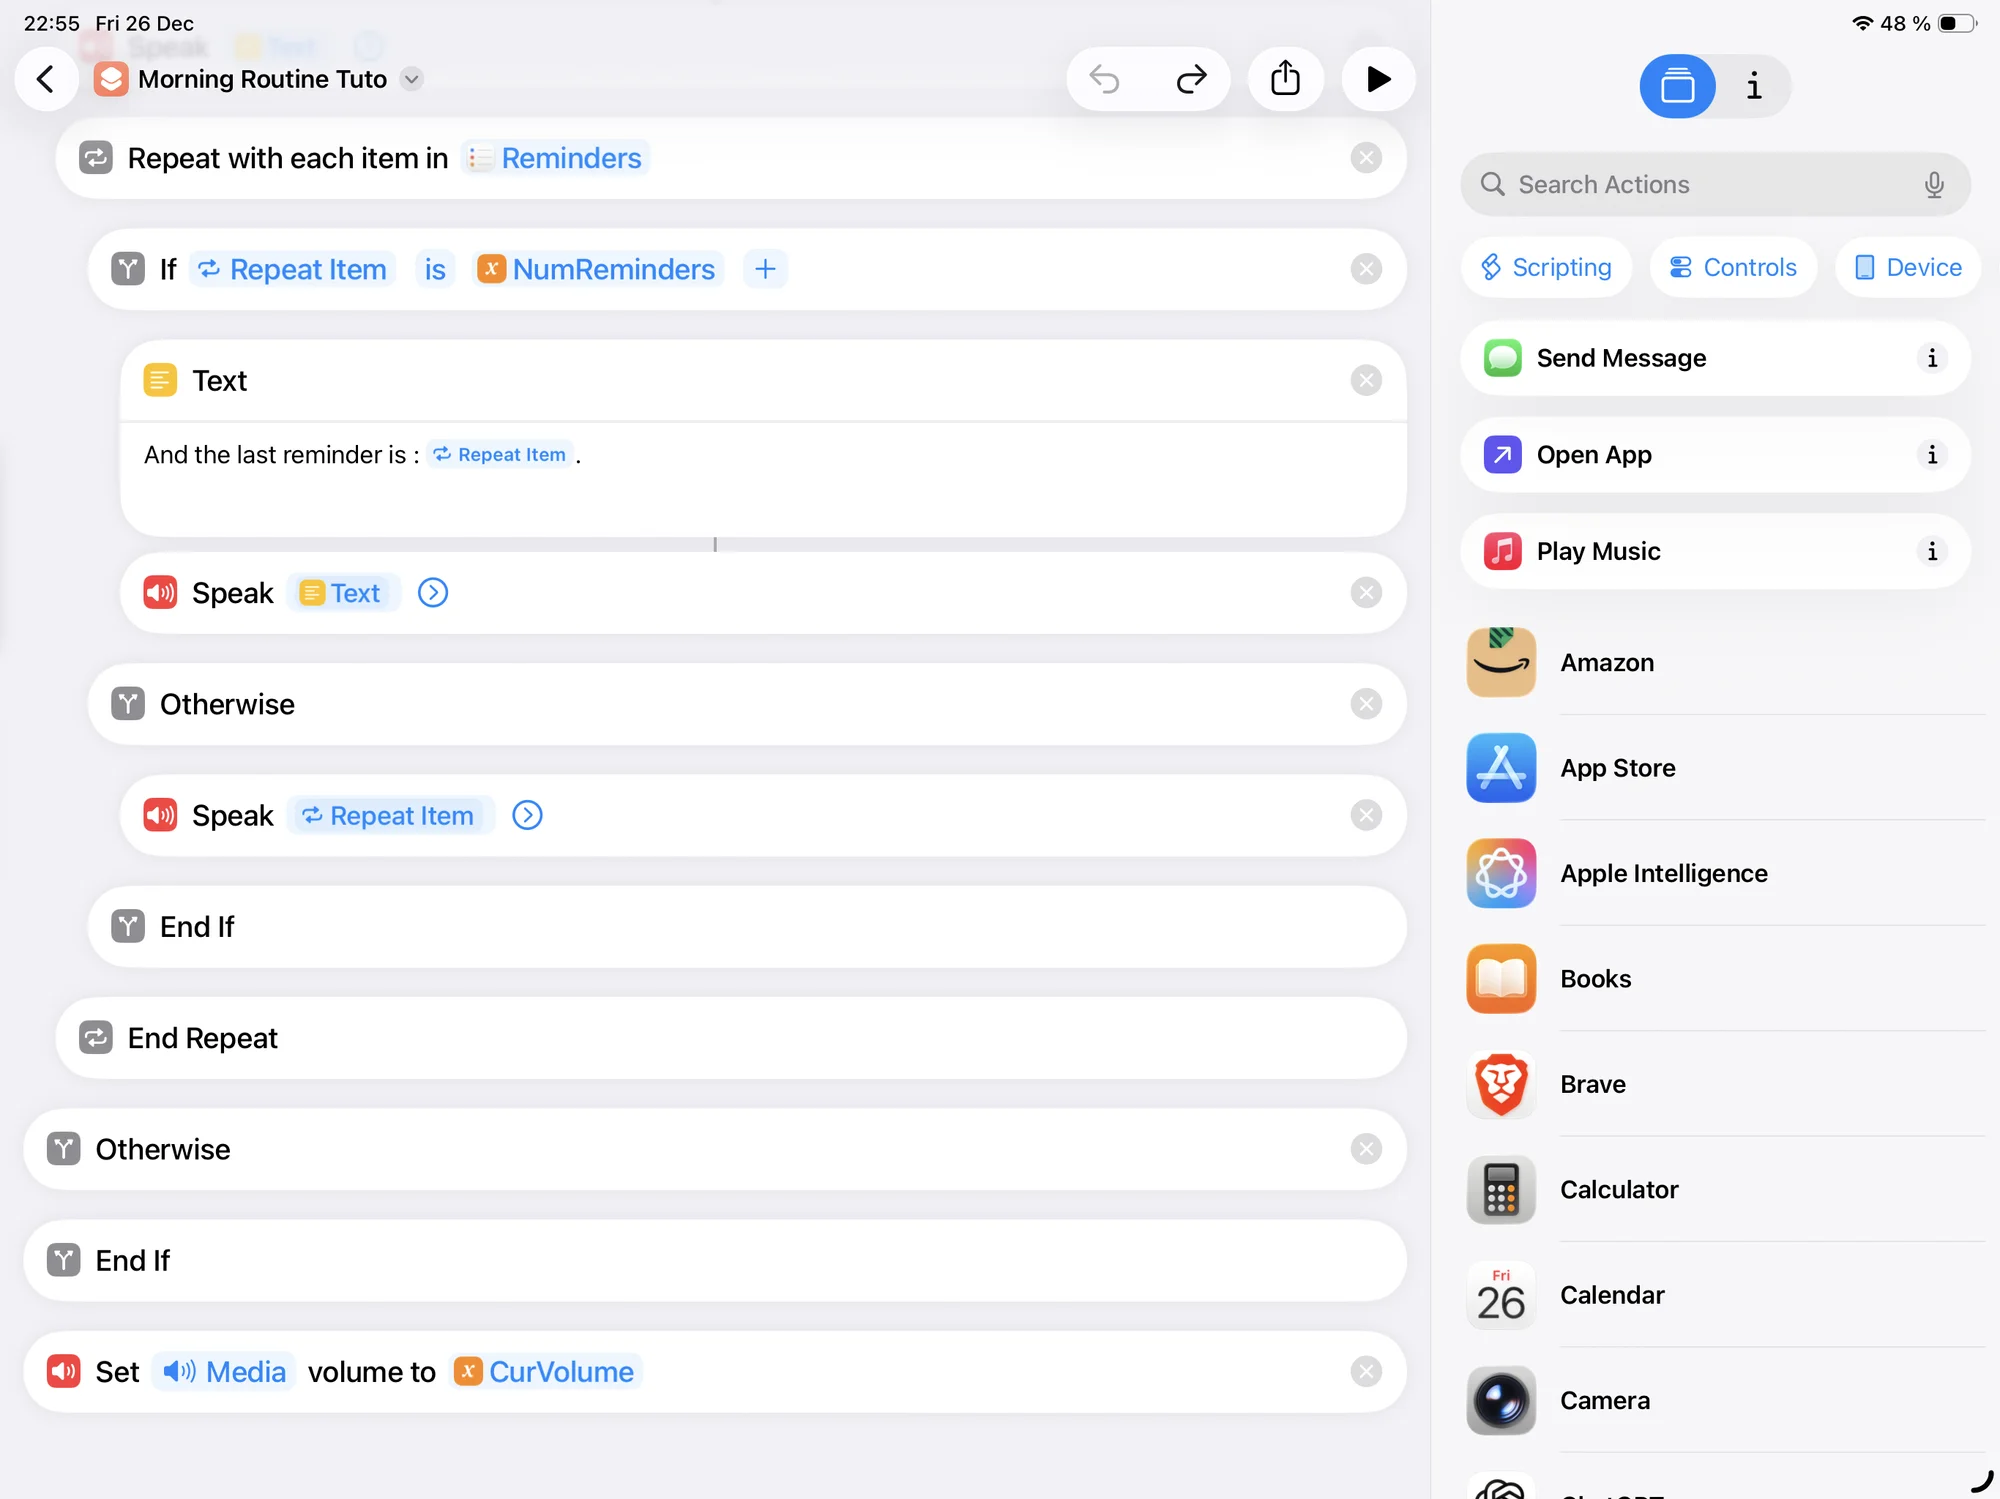
When the reminder is not the last one in the list, Siri simply reads its content.
Once all reminders have been announced, the routine is complete. All that remains is to restore the device’s initial volume (see last action in the figure above).
Testing the routine
Once the routine is finished, it is time to test it. To do this, you can create a dedicated widget, as shown in the video (at 21 minutes 45 seconds).
You then simply need to launch the widget to check that your routine works correctly.
Bonus 3: Automatic reading after turning off the alarm
If you want the routine to run without having to press a button, it is possible to create an automation that runs automatically when you turn off your alarm (however, an Internet connection is required). To do this, go to the “Automation” tab, choose “Alarm”, then select “When turned off”. All that remains is to choose the shortcut you just created:
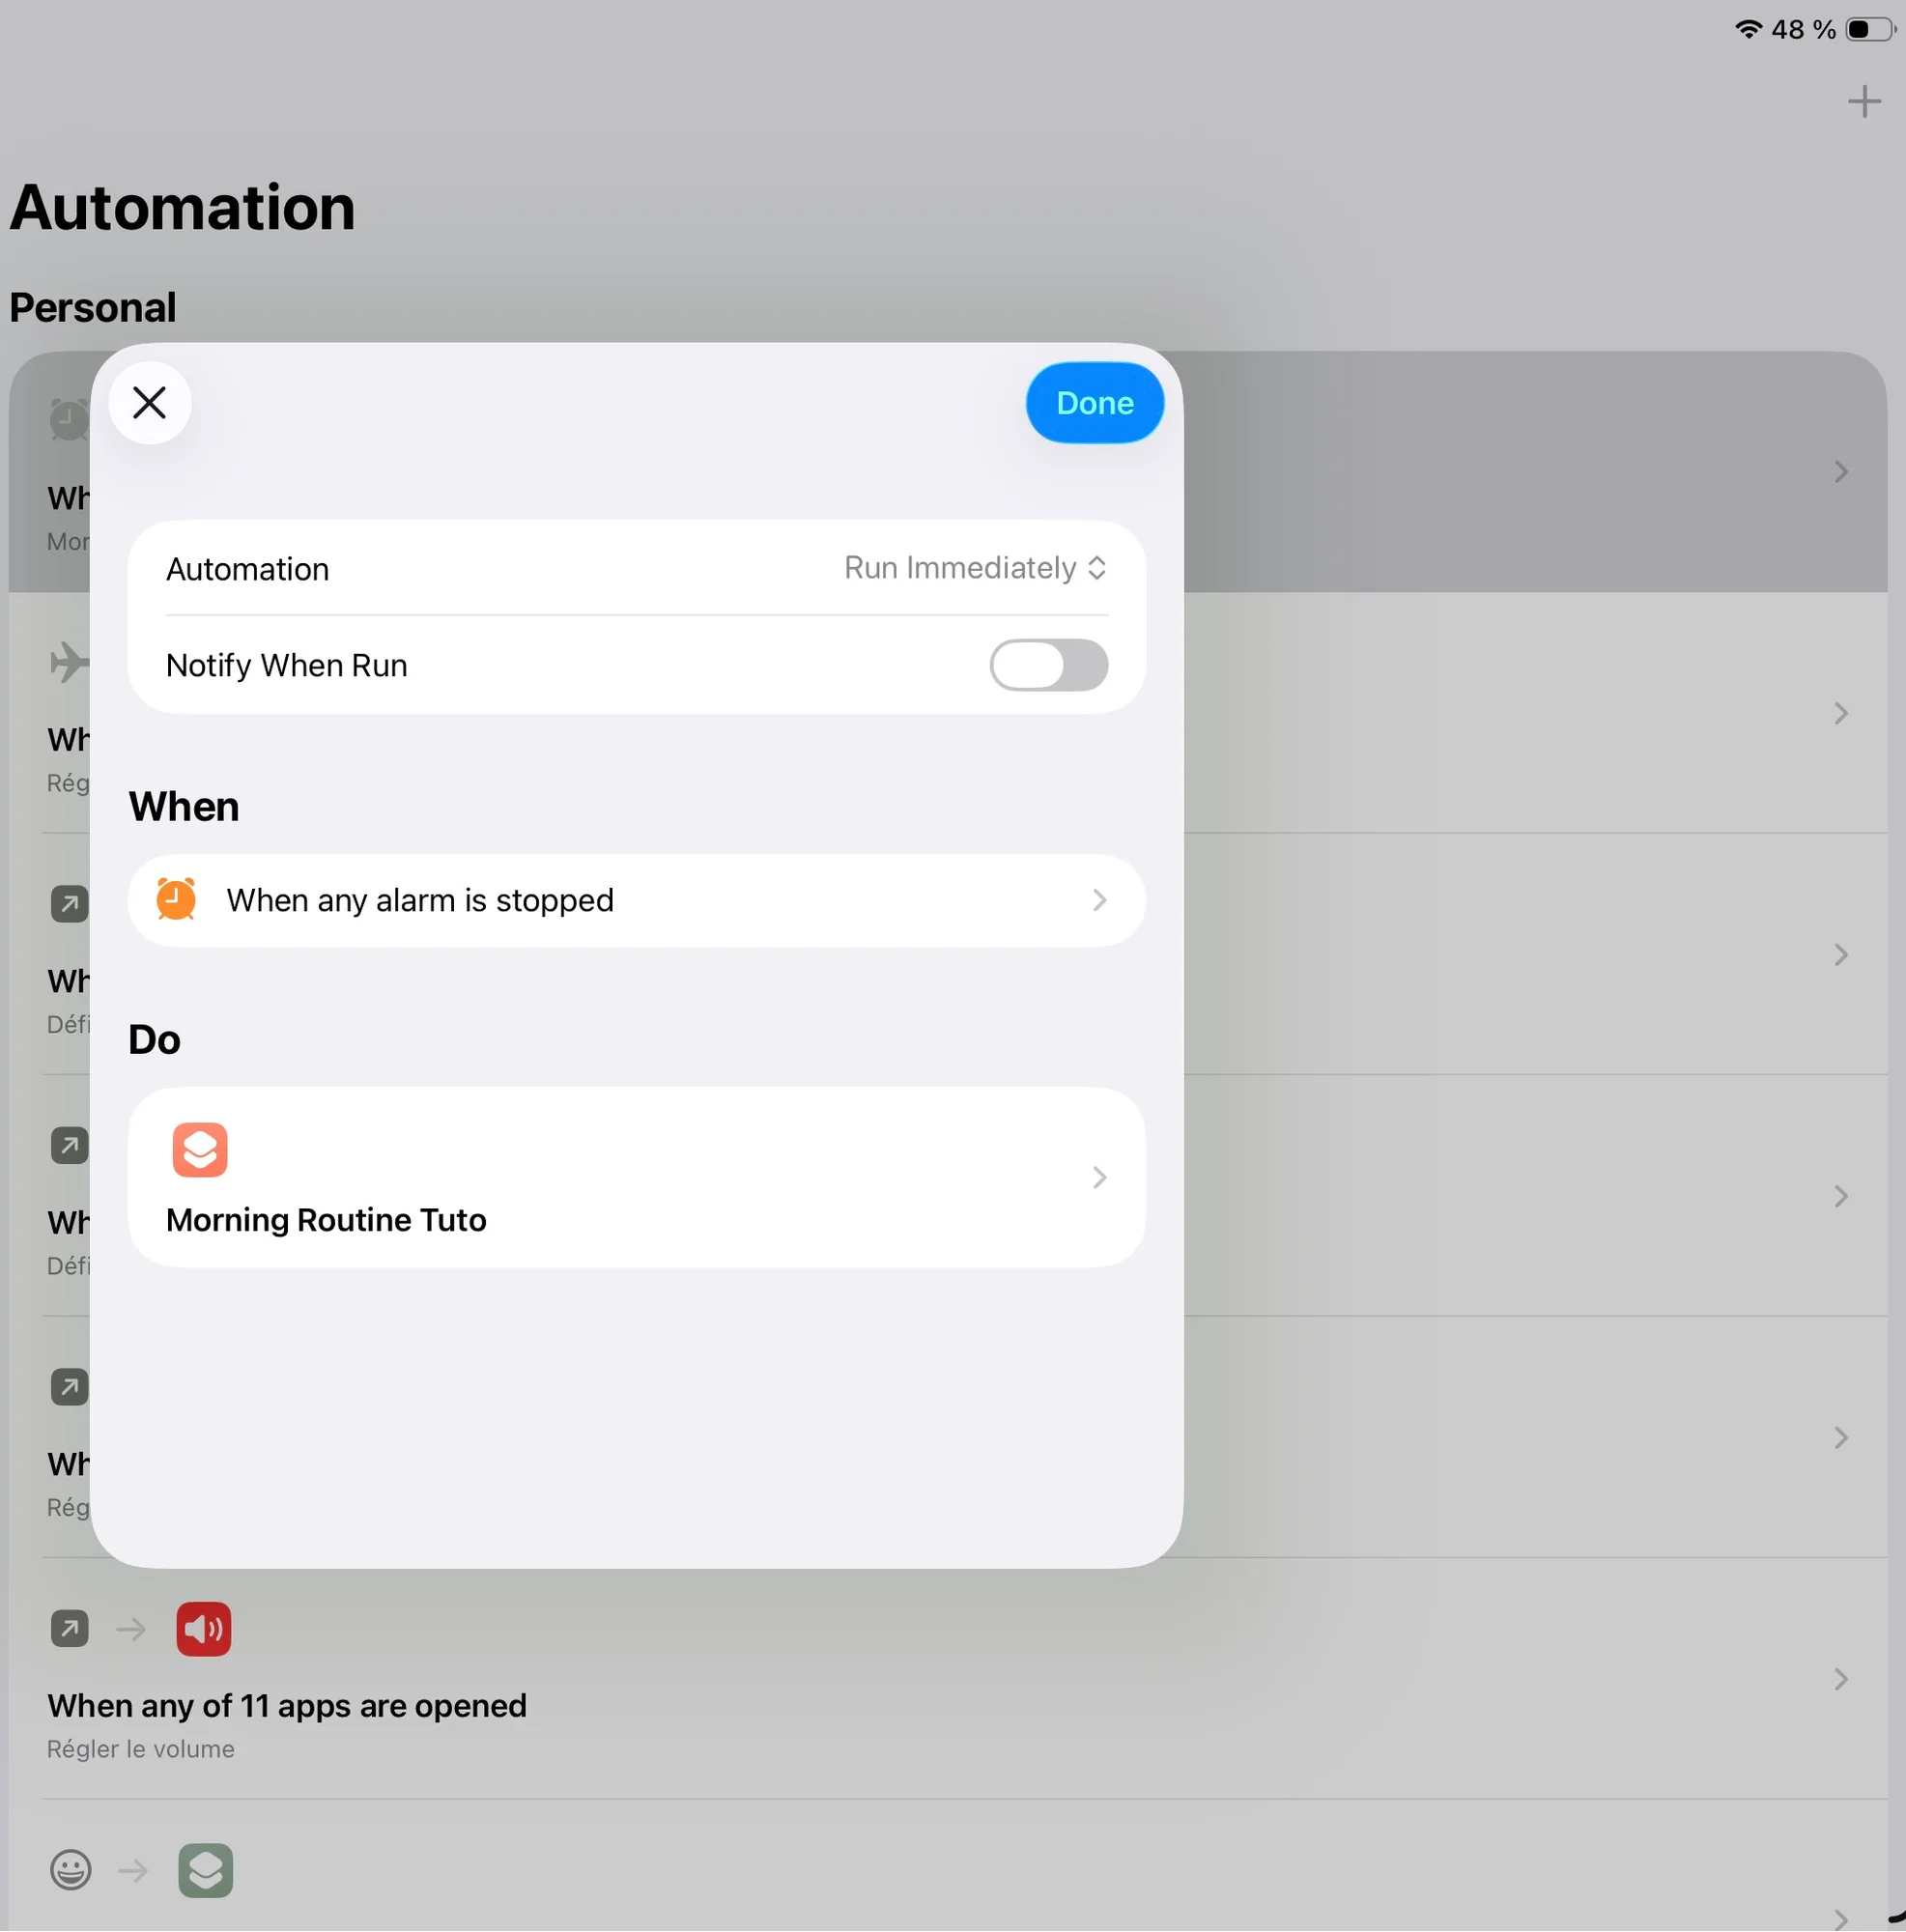
However, note that each time you turn off your alarm, the routine will trigger automatically, which can become annoying.
To avoid this, you can replace the automatic execution with a confirmation prompt (via a list), which will ask you whether you want to run the routine or not:
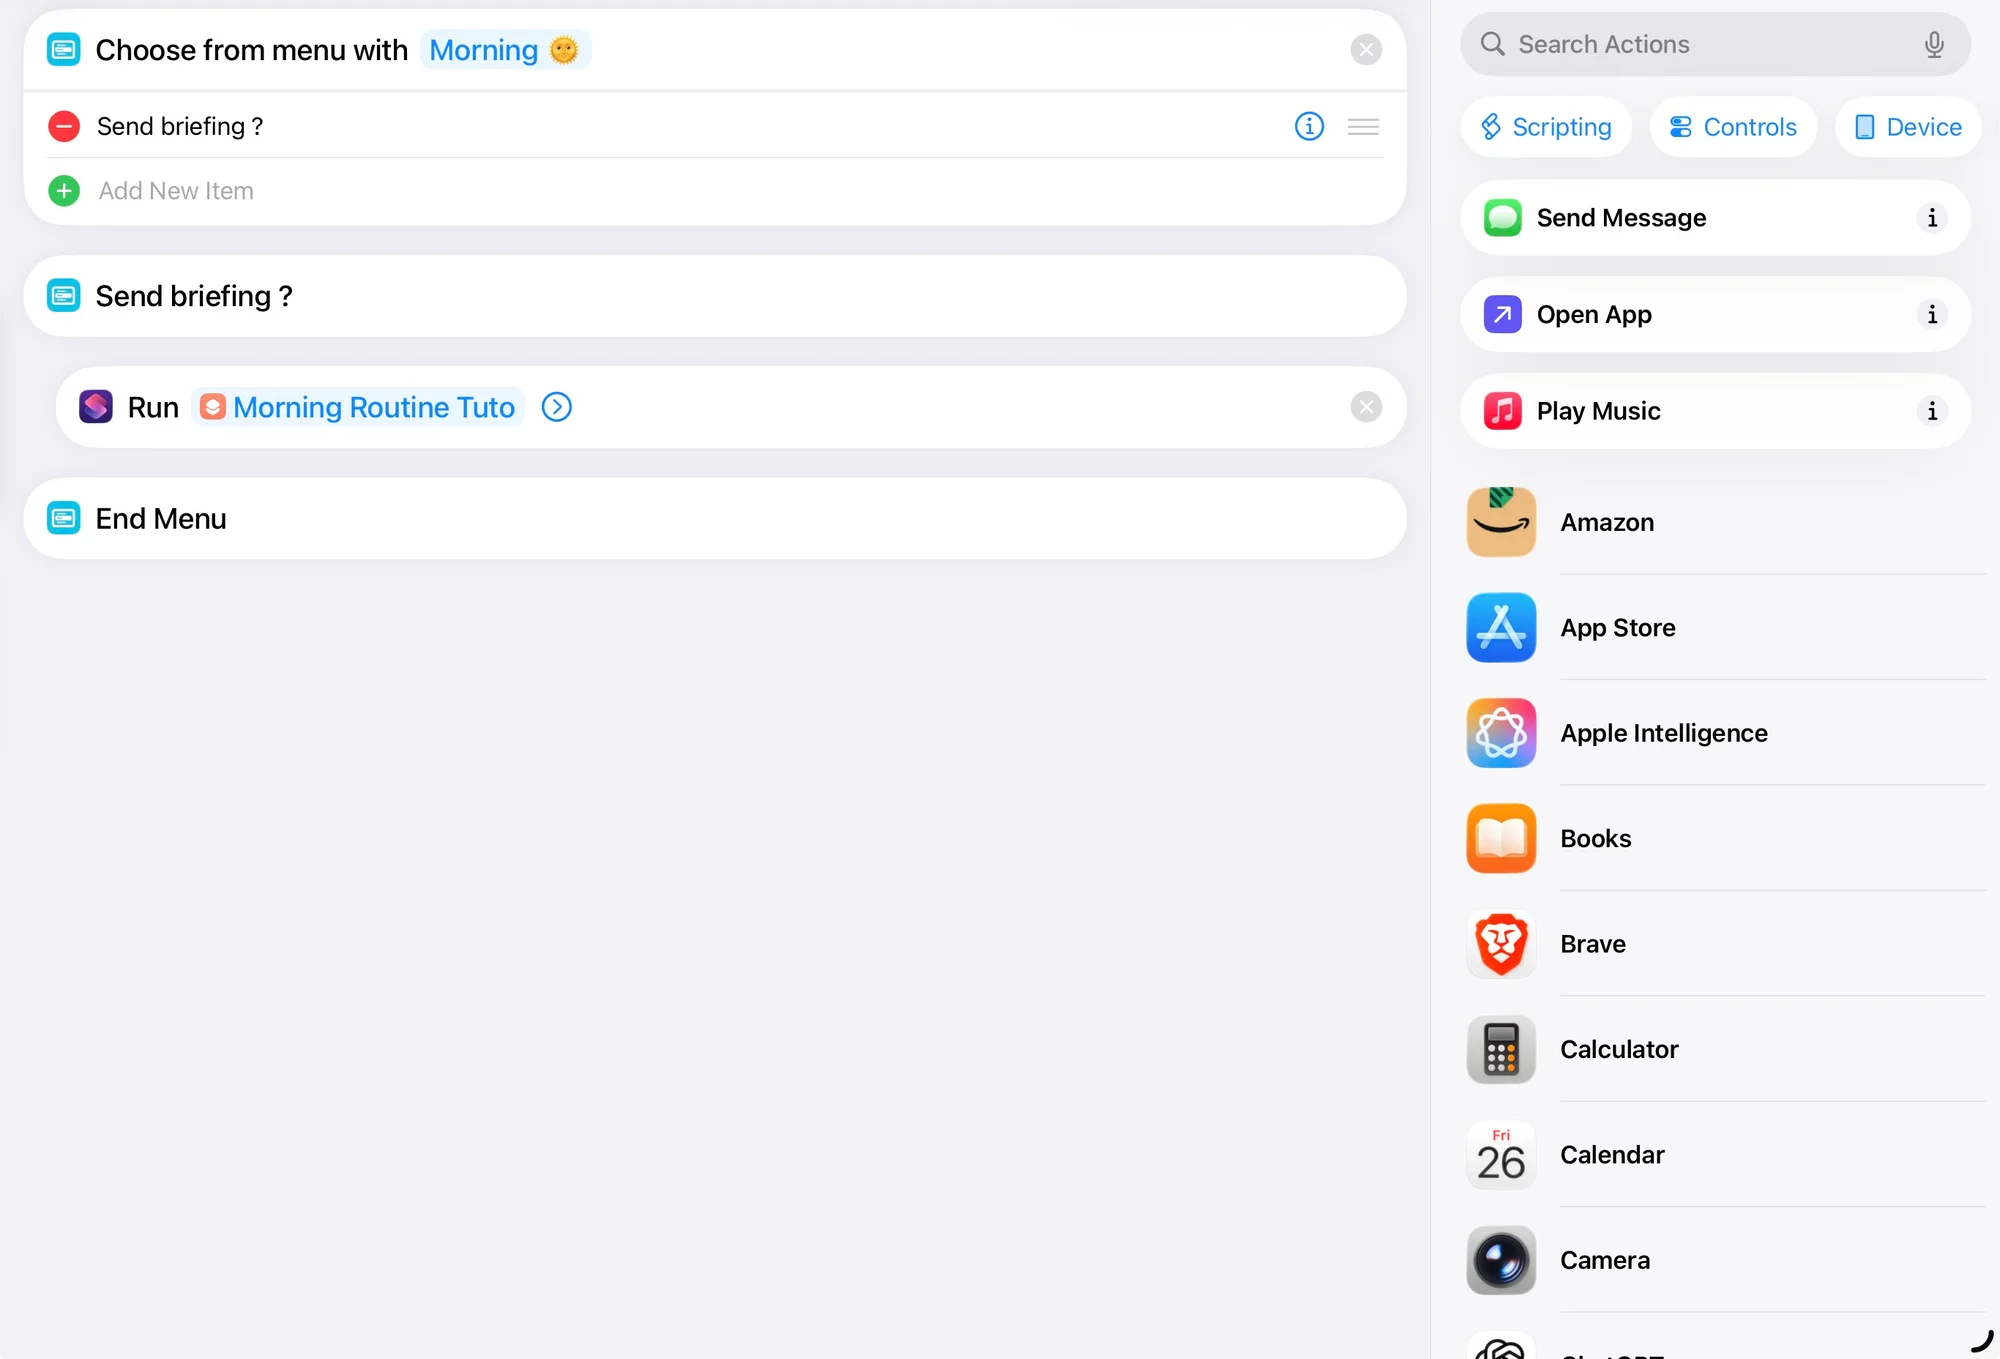
This is personally the option I chose, in order to avoid triggering it at the wrong moment.
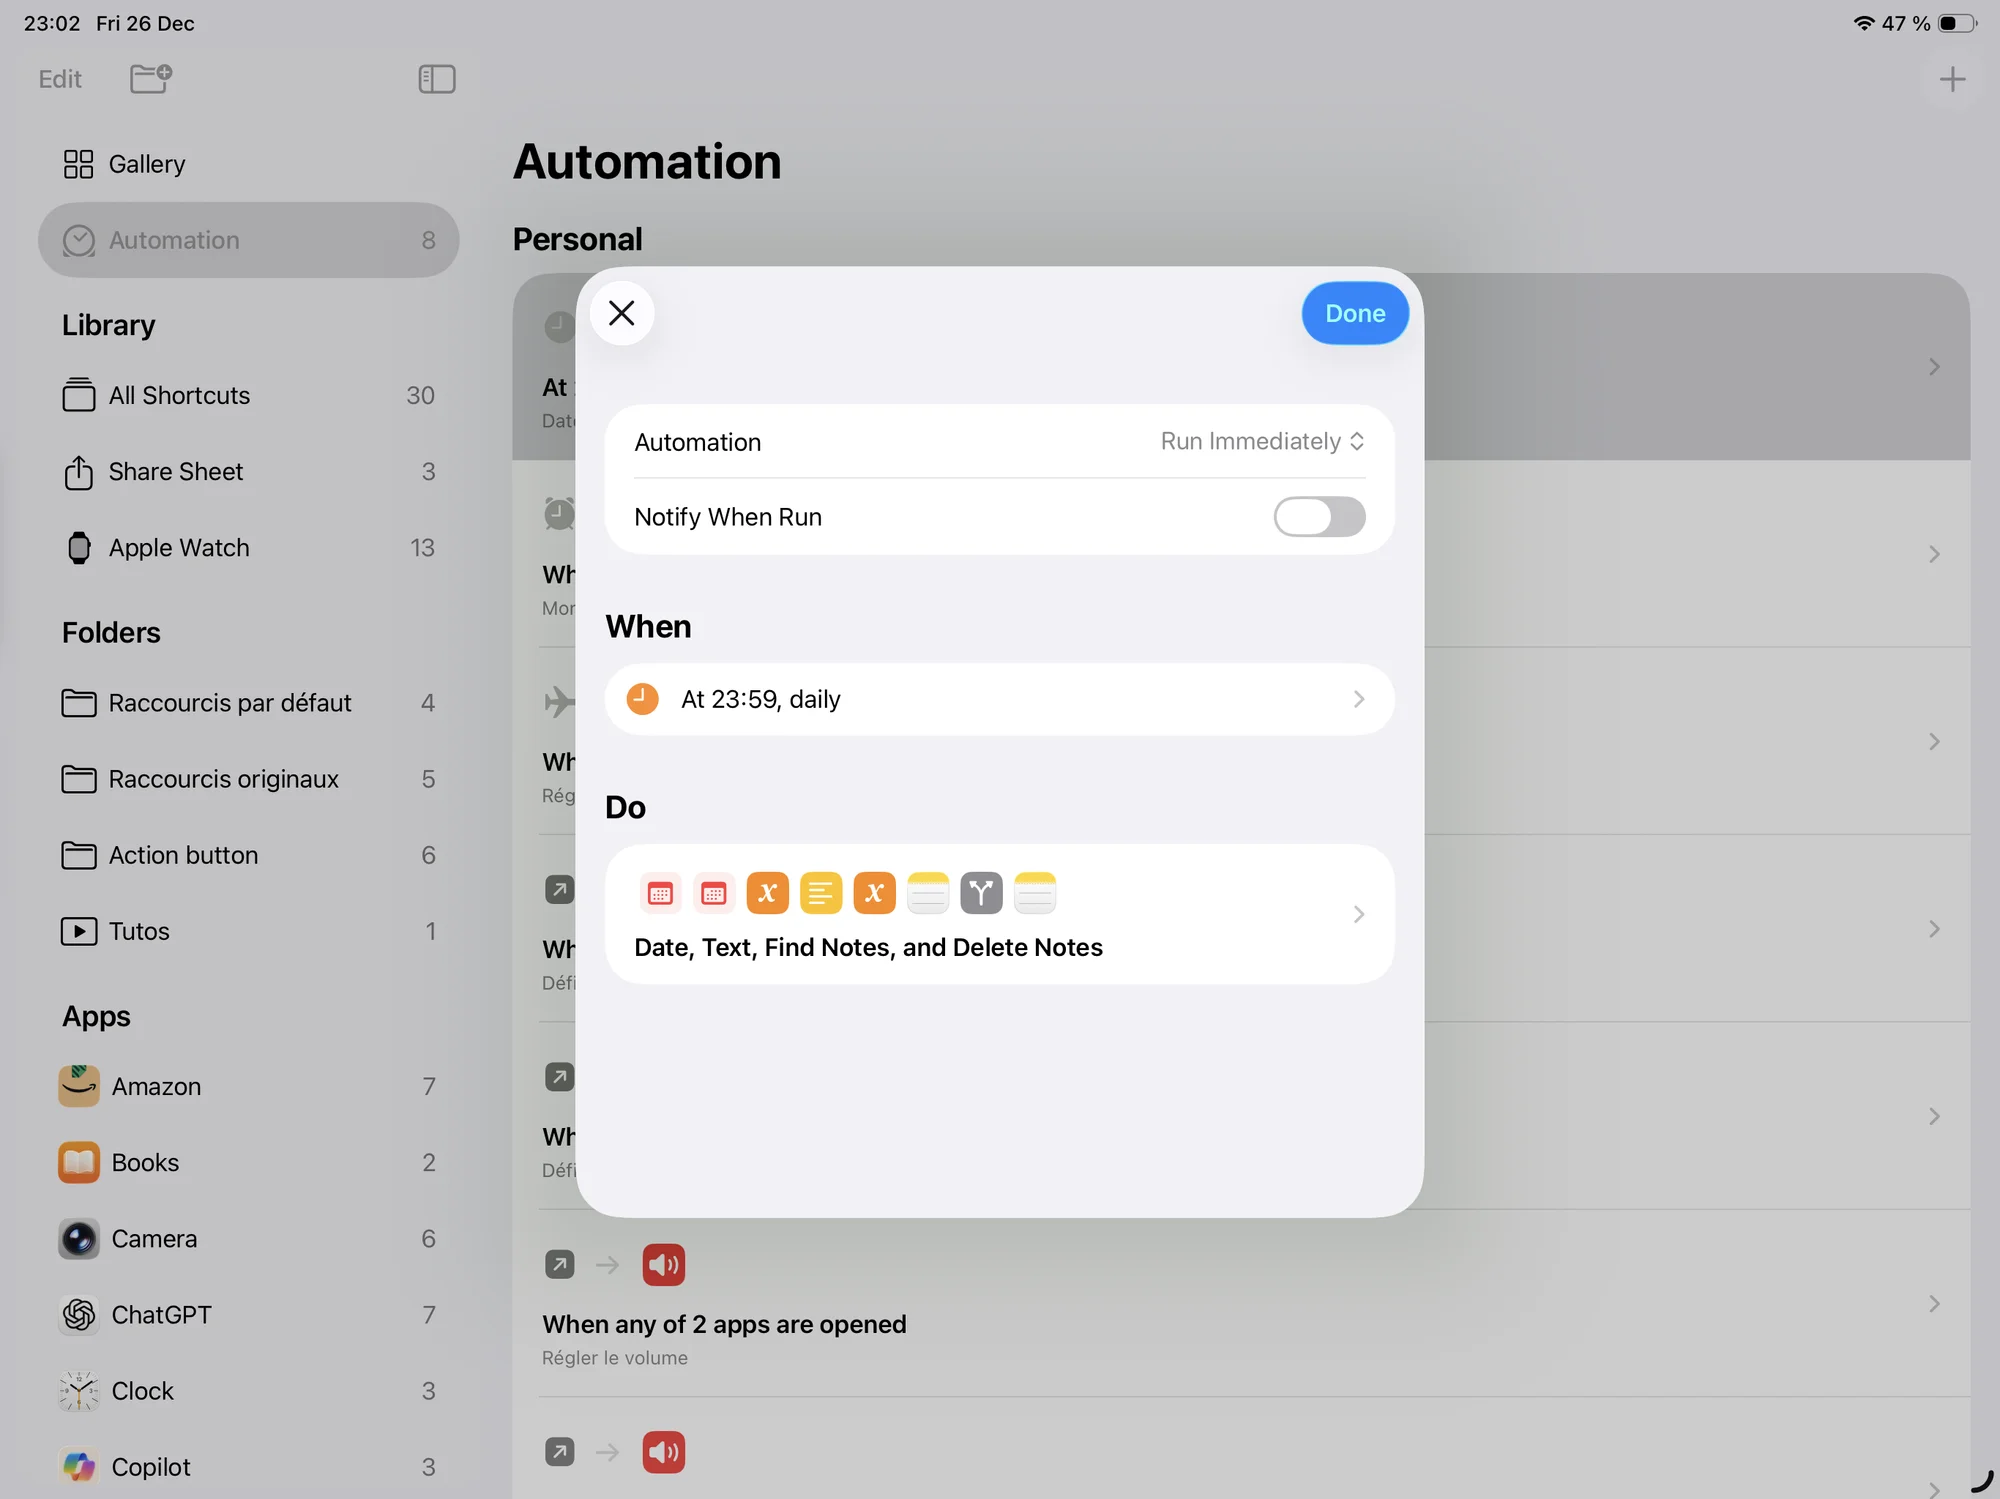
Bonus 4: Automating the deletion of the note
It is also possible to automate the deletion of the note in order to keep your iCloud folder clean. Since the note is only useful for the current day, letting it accumulate would eventually clutter your storage space. To avoid this, we will create an automation that runs every night at 11:59 p.m. and automatically deletes the day’s note (an Internet connection is required if your folder is stored on iCloud).
Start by going to the “Automation” tab and creating a new one:
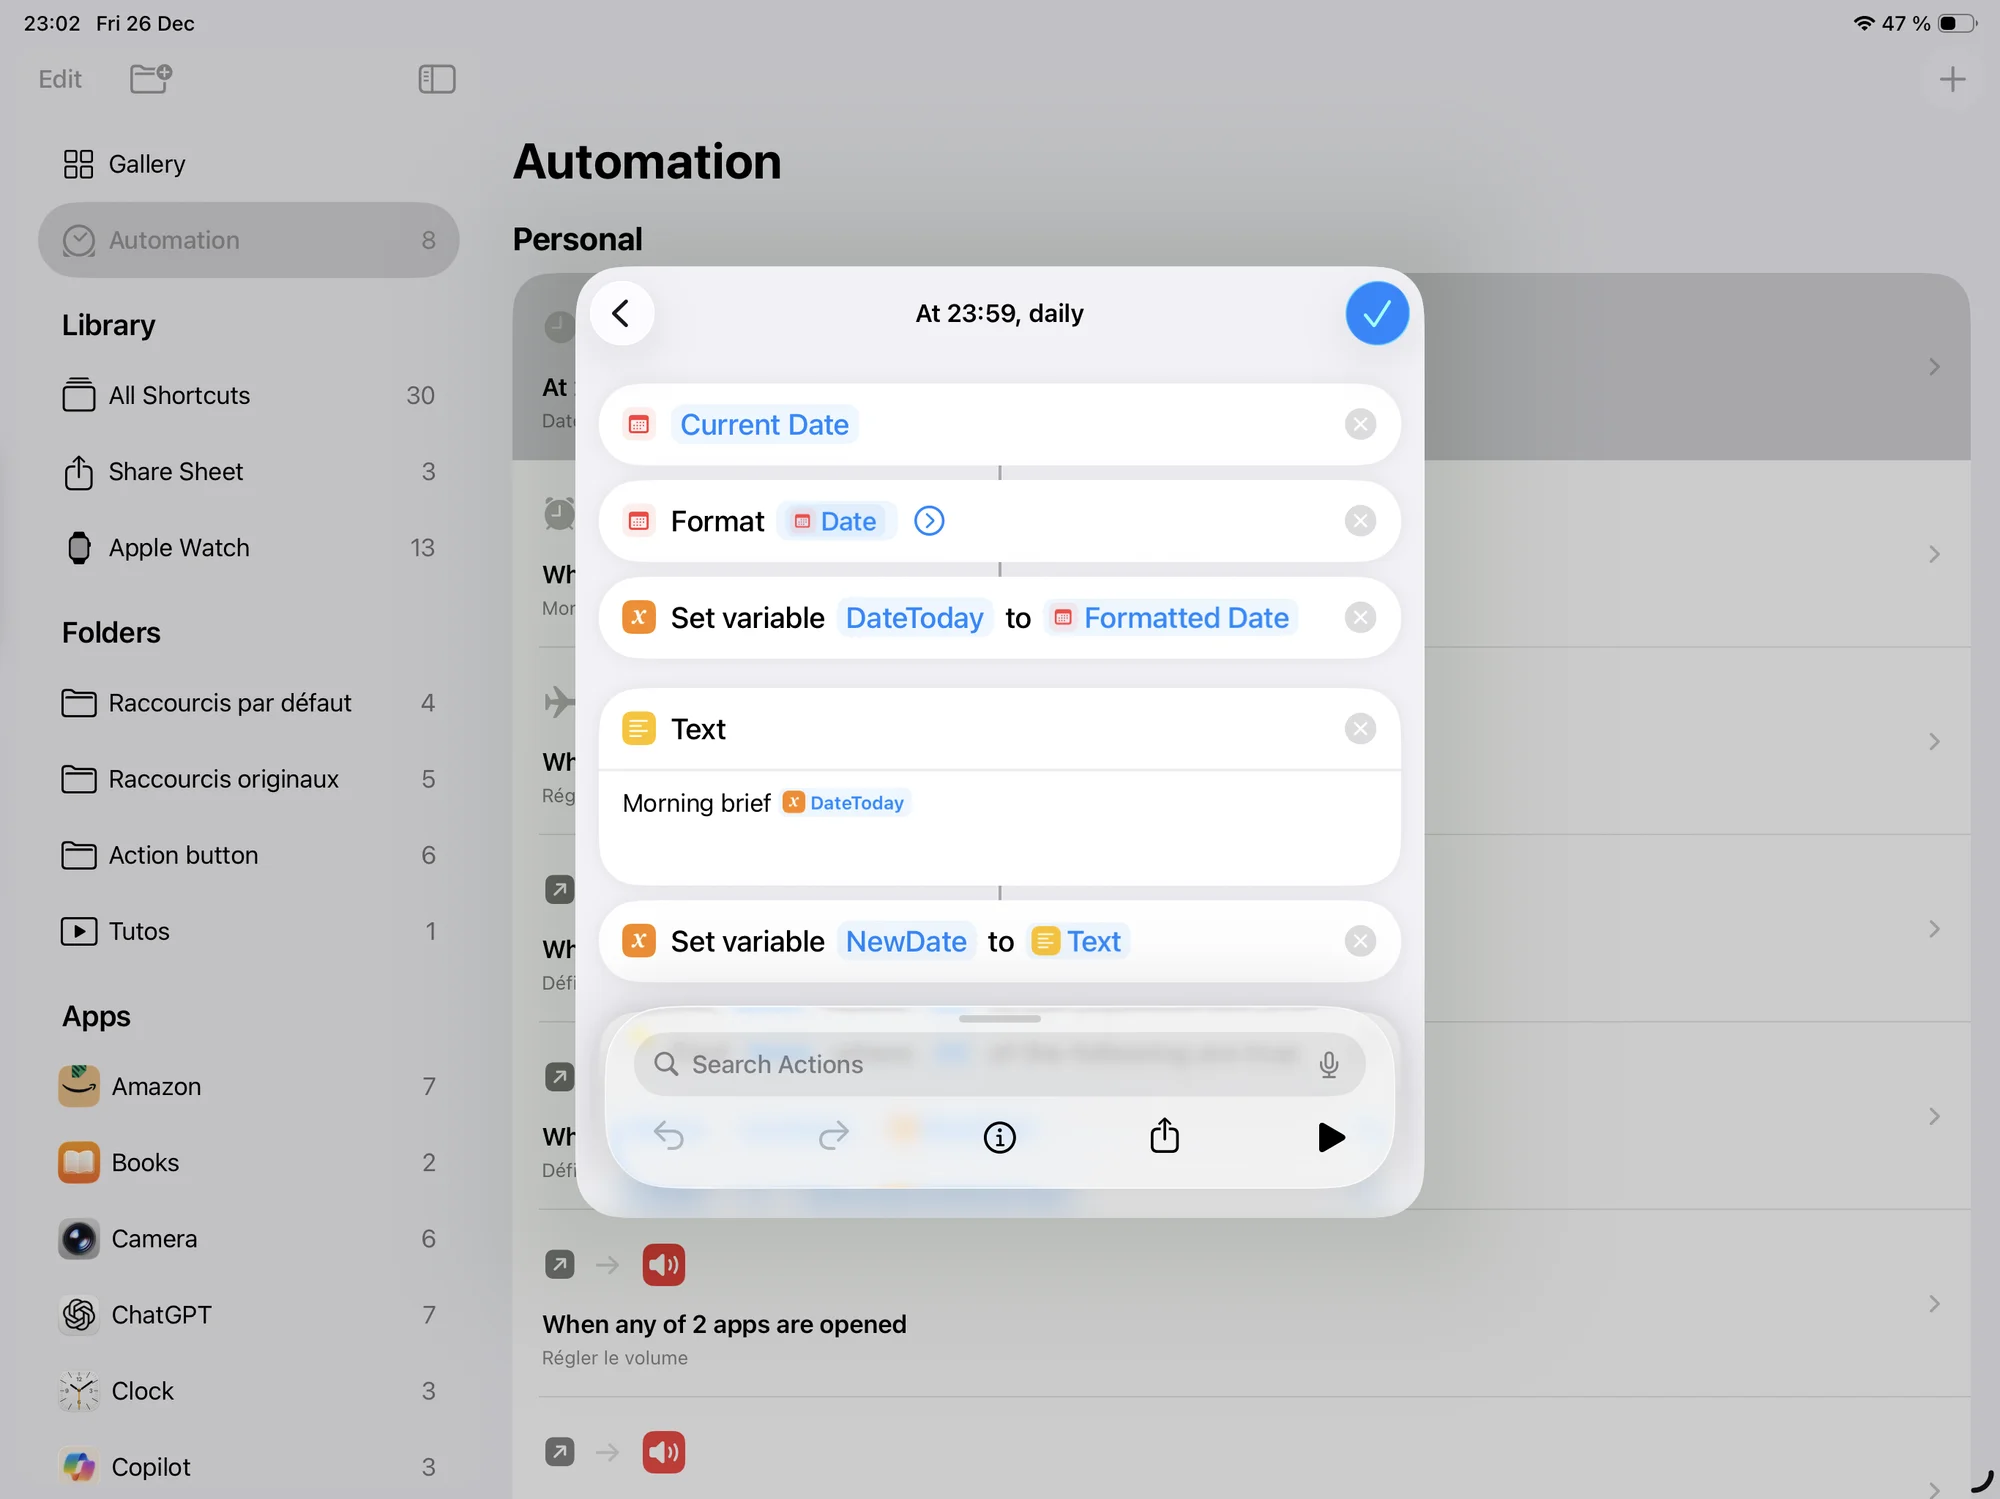
In the “Do” section, we will rebuild the note’s name using the formatted date, exactly as in the main routine (routine above):
We then search for this note in our iCloud folder:
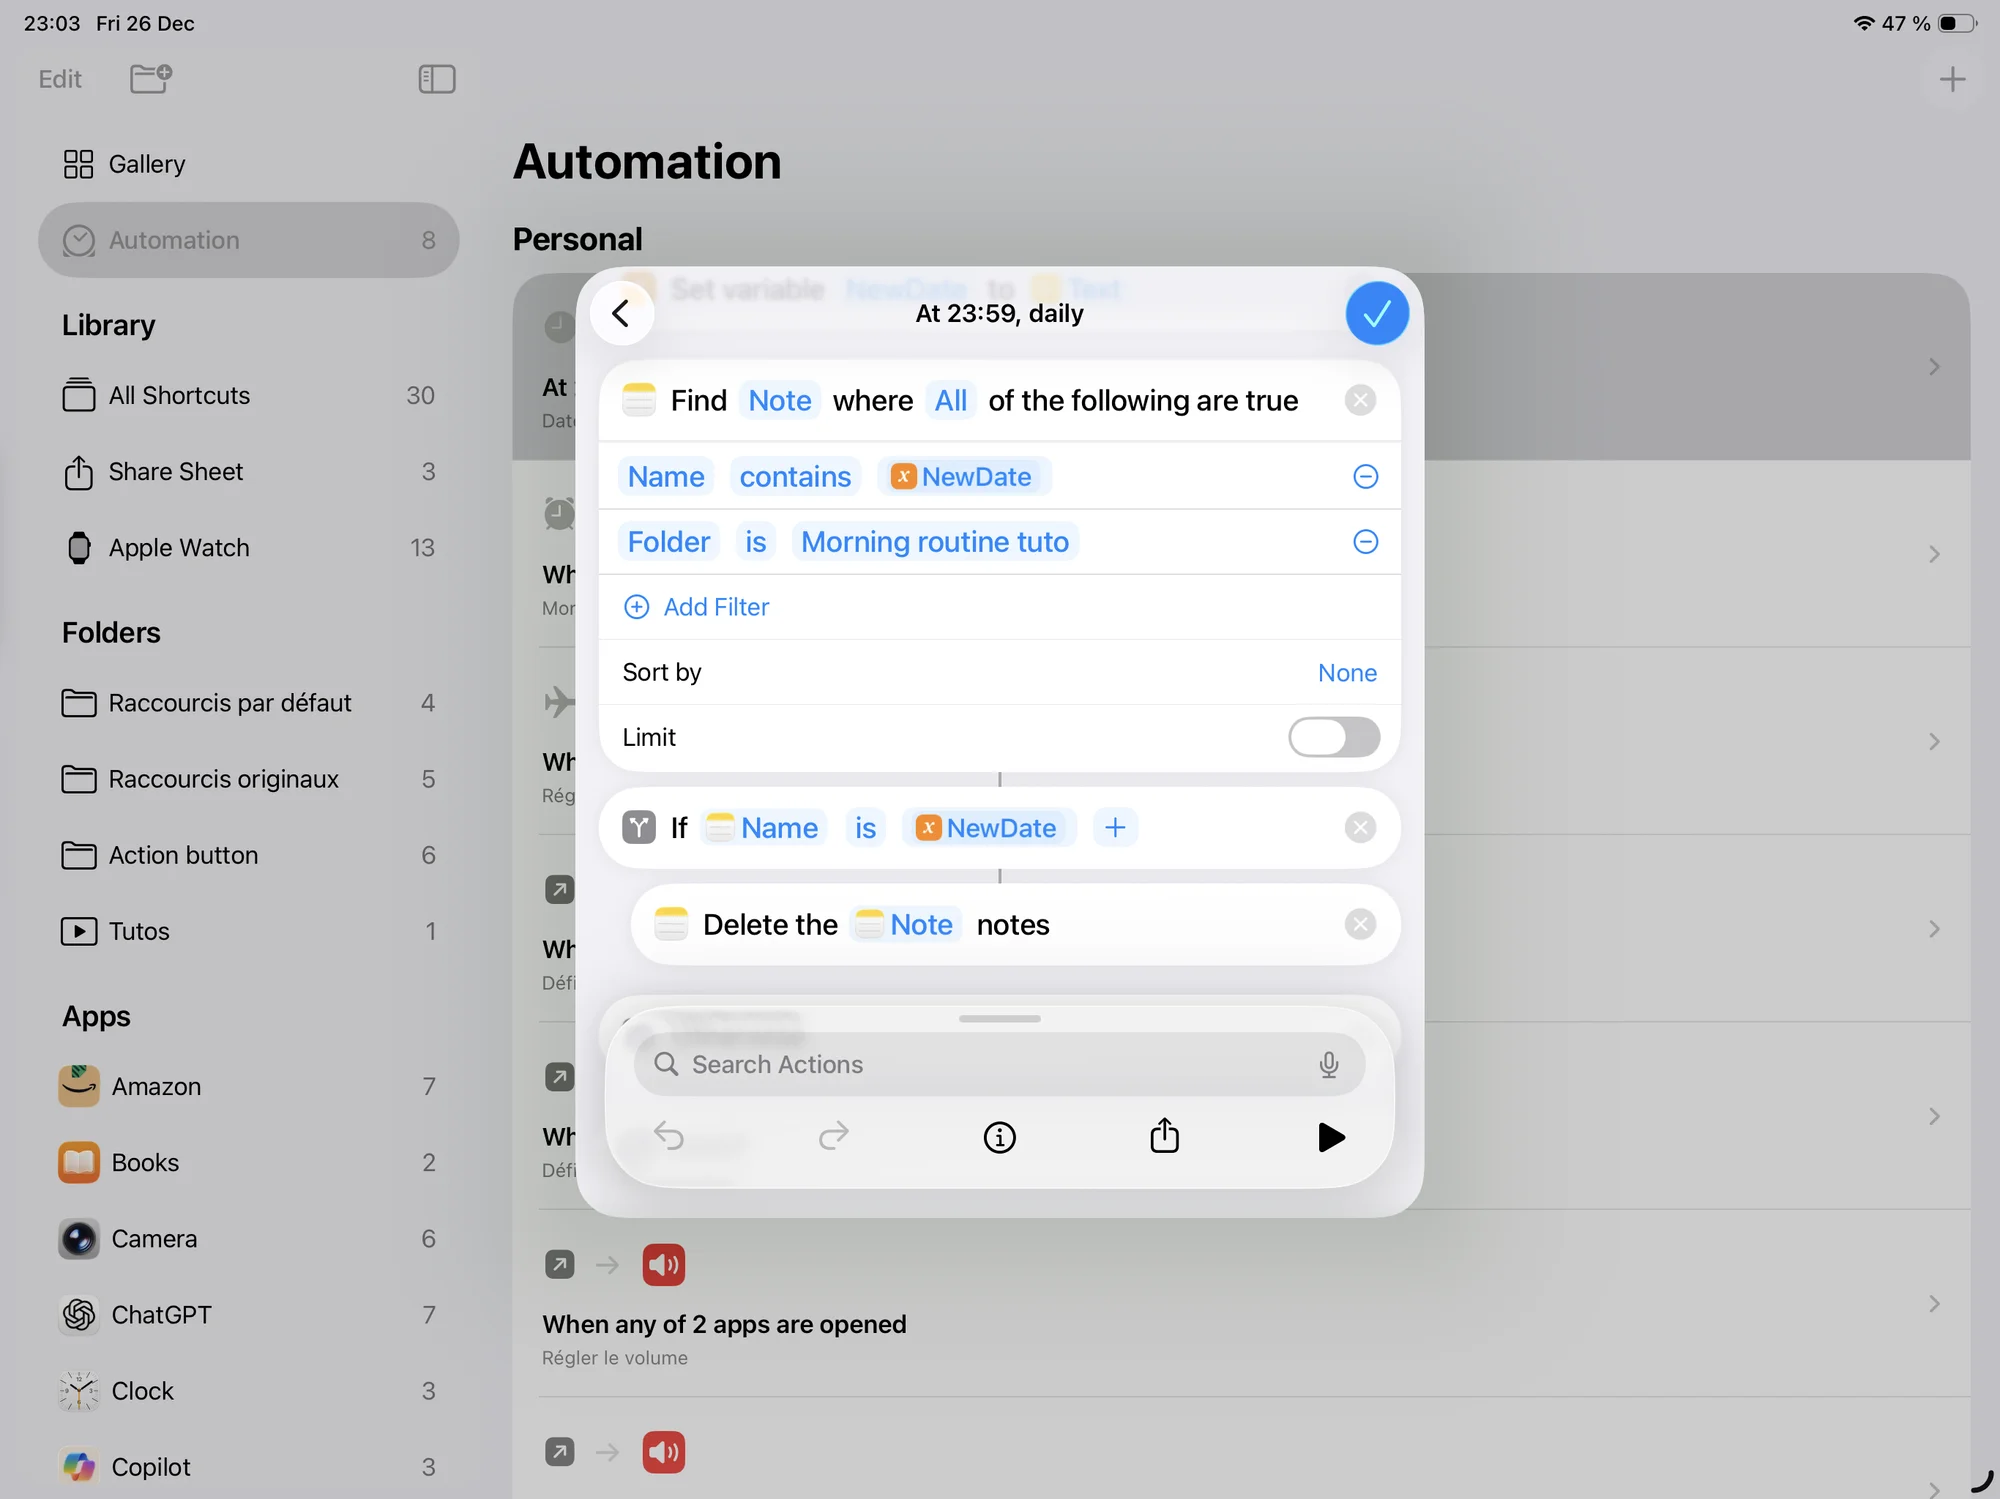
If the note found has the same name as today’s note, we delete it using the “Delete Notes” action:
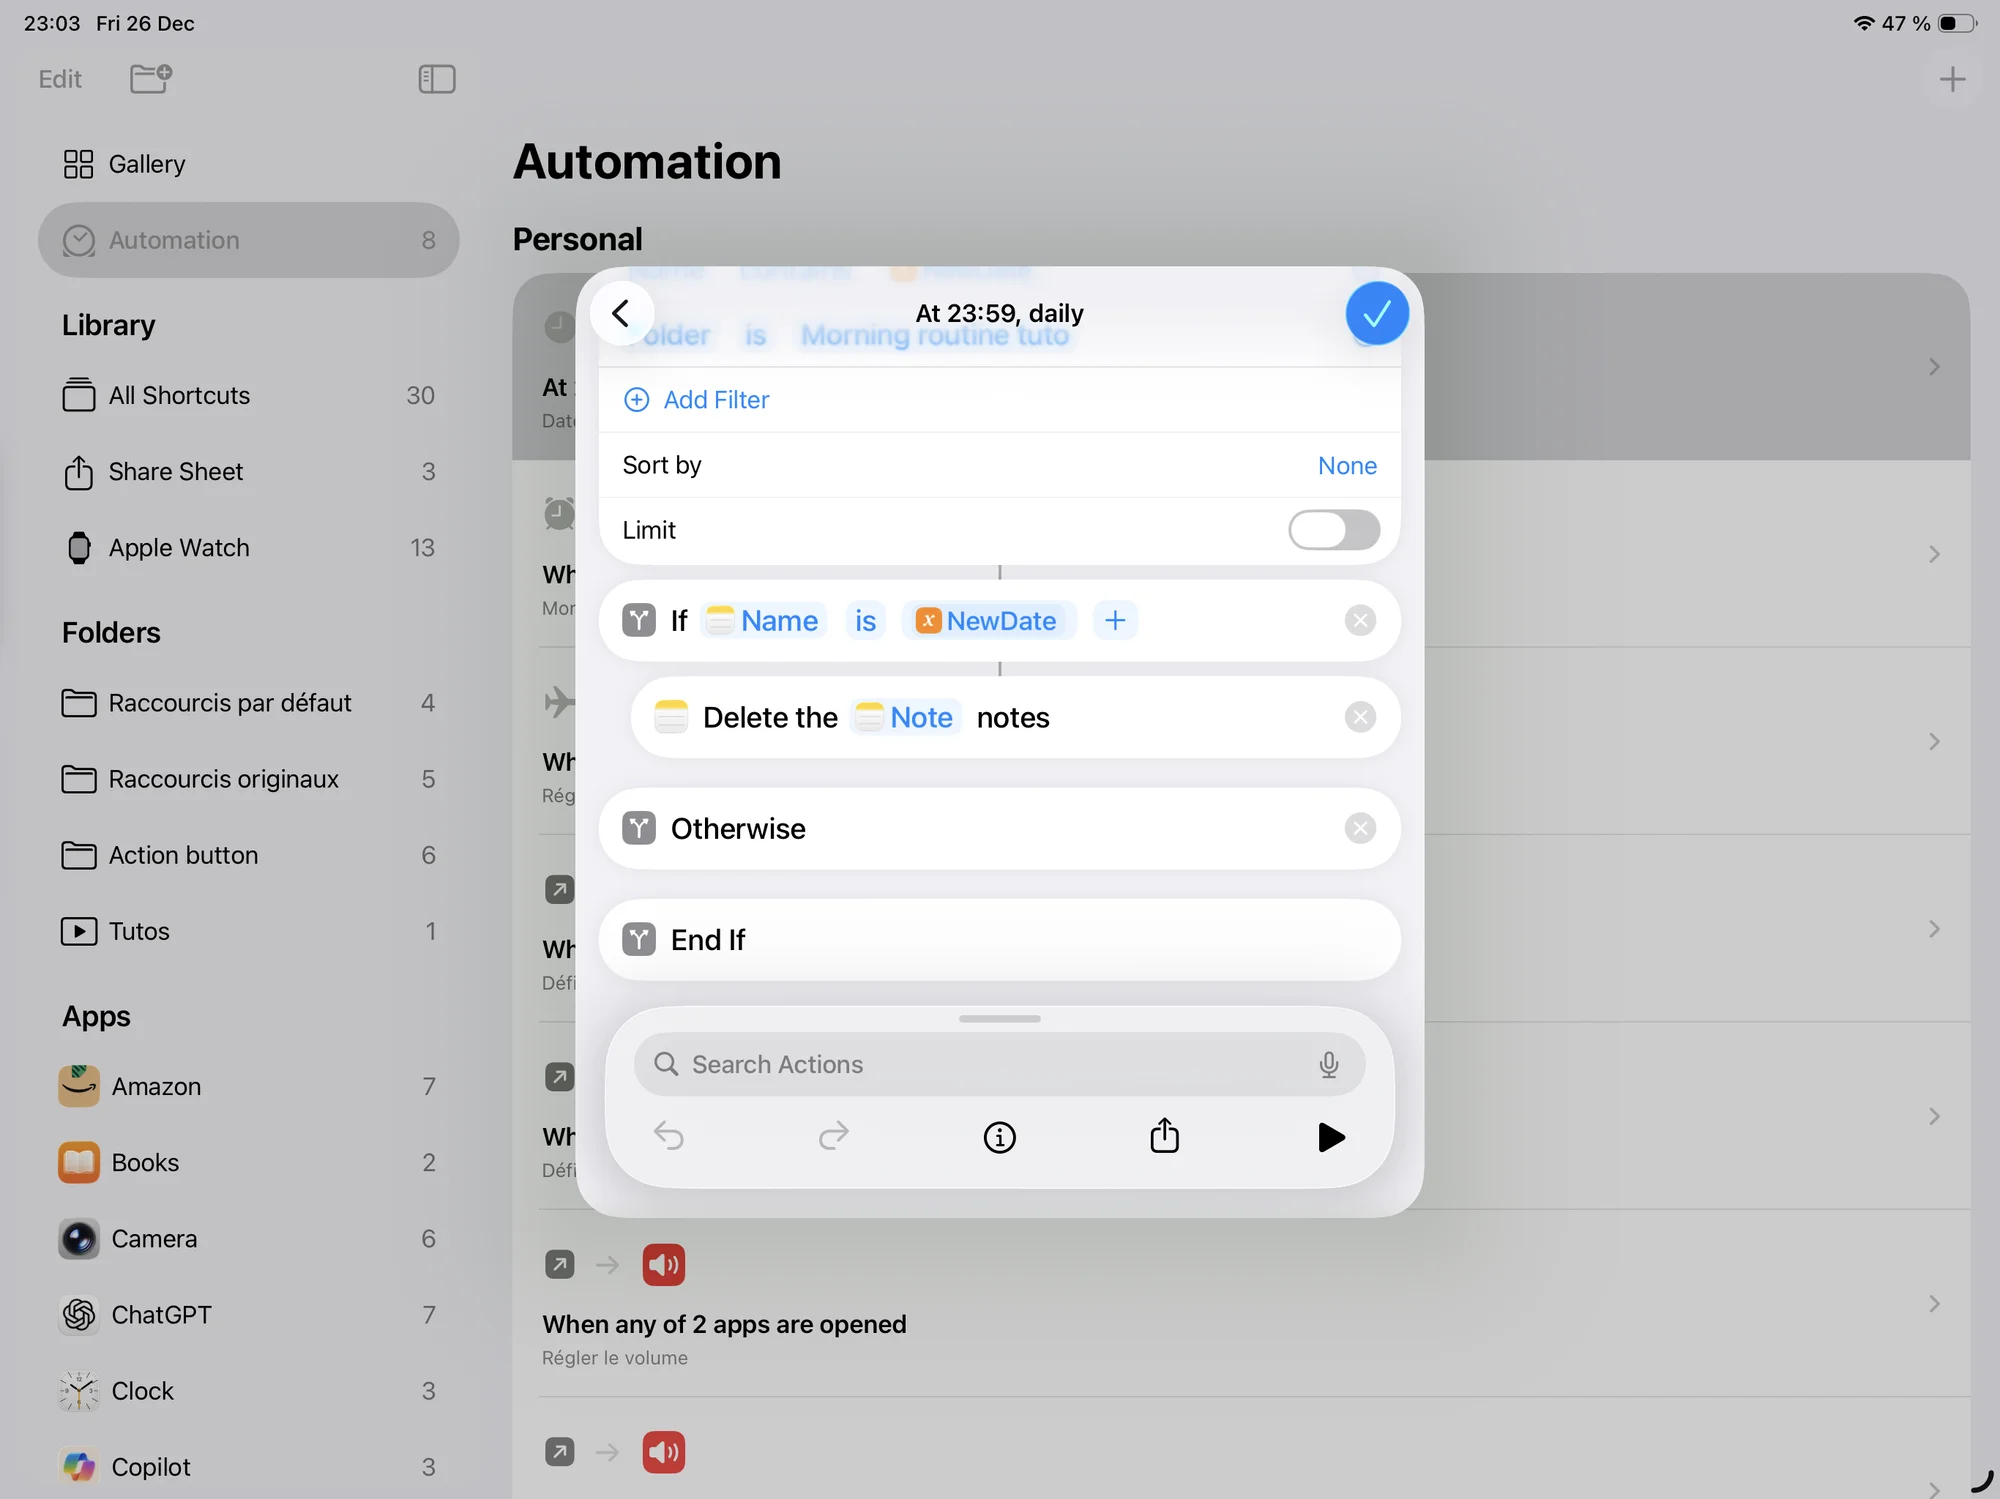
Thanks to this automation, the day’s note is automatically deleted every night.
Video
If you are stuck at any step or if you want to follow the creation of the routine step by step, you can watch the following video (in English):
Downloads
You will also find the shortcut link here (just remember to modify the name of your iCloud folder before using it https://www.icloud.com/shortcuts/5bb01e20428d41e9adf2d199309969c1.